Unlock the Science Behind Every Bottle Under Your Sink—and Learn Exactly When (and When Not) to Use Them
Have you ever stood paralyzed in the cleaning aisle, wondering why there are seventeen different products for “kitchen surfaces”? Or mixed vinegar and baking soda for a satisfying fizz, only to realize you’d neutralized both cleaners’ effectiveness? You’re not alone. This guide transforms cleaning from guesswork into grounded science. We’ll unpack the molecular mechanics of acids, bases, enzymes, solvents, and oxidizers—explaining precisely how they work, where they excel, why certain combinations create dangerous reactions, and how to build a minimalist, effective toolkit tailored to your home’s unique needs. No chemistry degree required. Just clear, actionable knowledge to clean smarter, safer, and with lasting confidence.
Introduction: Why Chemistry Isn’t Just for Labs—It’s for Your Kitchen Counter
Cleaning is chemistry in motion. Every time you wipe a spill, scrub a stain, or disinfect a surface, you’re initiating chemical reactions. Grease dissolves. Minerals loosen. Organic matter breaks down. Understanding the “why” behind these processes empowers you to make intentional choices instead of relying on marketing claims or trial-and-error. This isn’t about memorizing pH scales or chemical formulas. It’s about developing a practical mental framework: recognizing soil types, matching cleaner chemistry to the task, and respecting surface compatibility and human safety.
This guide synthesizes established chemical principles with real-world household applications. Explanations align with foundational concepts documented in resources like the Journal of Chemical Education and safety protocols from the Environmental Protection Agency (EPA) and Centers for Disease Control and Prevention (CDC). We prioritize clarity without oversimplification—translating technical accuracy into everyday language. Whether you’re removing hard water stains from a shower door, tackling pet accidents on carpet, or simply wanting to avoid dangerous cleaner combinations, this knowledge becomes your most valuable cleaning tool.
Note on Safety and Authority: All safety protocols referenced herein reflect consensus guidelines from OSHA, the American Association of Poison Control Centers, and product Safety Data Sheets (SDS). Surface compatibility recommendations are derived from material science standards published by organizations like the Marble Institute of America. This information is presented for educational purposes; always follow specific product instructions and consult professionals for complex scenarios.
The Three-Layer Framework: Your Universal Cleaning Decision System
Before exploring individual cleaner types, adopt this foundational framework used by professional cleaning technicians, facility managers, and restoration specialists. It eliminates guesswork by breaking every cleaning challenge into three sequential layers. Apply them in order—skipping a layer often leads to inefficiency, surface damage, or safety risks.
Layer 1: Identify the Soil Type (The “What”)
Not all dirt responds to the same chemistry. Misidentifying soil type is a primary cause of cleaning frustration. Categorize every mess into one of four types:
- Organic Soils: Carbon-based compounds. Examples: cooking oil, butter, blood, wine, coffee, grass, pet urine, food residue, bodily fluids. Key trait: Often sticky, greasy, or protein-based.
- Inorganic Soils: Mineral-based deposits. Examples: rust (iron oxide), limescale/hard water deposits (calcium carbonate), soap scum (calcium/magnesium salts), tarnish. Key trait: Chalky, crusty, crystalline, or metallic.
- Particulate Soils: Physical debris. Examples: dust, sand, mud, pollen, lint. Key trait: Dry, gritty, easily visible.
- Biological Soils: Living or once-living contaminants. Examples: mold, mildew, bacteria, viruses, algae. Key trait: Often fuzzy, discolored, or associated with moisture.
Practical Application: Face a cloudy film on your shower door? Rub it with a dry finger. If it feels gritty → particulate (dust + hard water). If it feels chalky and won’t wipe off → inorganic (limescale). If it’s slimy or black-speckled → biological (mold/mildew). This diagnosis directs your next step with precision.
Layer 2: Match Cleaner Chemistry to Soil Chemistry (The “How”)
This is where acids, bases, enzymes, and solvents earn their place. The core scientific principle: “Opposites attract and dissolve.” Acidic soils respond to alkaline cleaners; alkaline soils respond to acidic cleaners. Enzymes and solvents operate via targeted molecular mechanisms.
| Soil Type | Optimal Cleaner Chemistry | Primary Mechanism | Real-World Analogy |
|---|---|---|---|
| Grease, Oil, Wax | Alkaline (Base) | Saponification (turns fats into soap) + Emulsification | Like using dish soap to wash oily hands |
| Rust, Limescale | Acidic | Acid dissolution (converts minerals to soluble salts) | Like lemon juice dissolving tarnish on copper |
| Protein Stains | Enzymatic (Protease) | Hydrolysis (breaks peptide bonds) | Like saliva beginning to digest food in your mouth |
| Starch-Based Stains | Enzymatic (Amylase) | Hydrolysis (breaks starch chains) | Like amylase in saliva breaking down bread |
| Mold, Mildew | Oxidizing Agent | Oxidation (breaks pigments, destroys cell walls) | Like sunlight fading colored fabric over time |
| Adhesive Residue | Solvent | Dissolution (“like dissolves like”) | Like nail polish remover dissolving polish |
| Dust, Dry Debris | Surfactant + Mechanical | Suspension (lifts particles into water) | Like a vacuum lifting dust from carpet |
The Fundamental Principle: Cleaning efficacy hinges on chemical compatibility, not scrubbing force. Using vinegar (acid) on grease (organic/alkaline soil) creates neutralization before the cleaner contacts the soil—wasting effort and potentially setting the stain. Always match chemistry to soil.
Layer 3: Assess Surface Compatibility and Human Safety (The “Guardrails”)
The most effective cleaner is useless—or destructive—if it damages surfaces or endangers people. This layer requires two critical checks:
- Surface Sensitivity Audit:
- Natural Stone (Marble, Limestone, Travertine, Onyx): Highly vulnerable to acids (etching) and strong alkalis (dulling). Requires pH-neutral cleaners only.
- Metal (Aluminum, Brass, Copper, Uncoated Iron): Acids cause pitting/corrosion; strong alkalis damage aluminum. Test first.
- Wood (Especially Oiled or Waxed): Water-based cleaners can warp; solvents strip finishes. Use minimal moisture.
- Fabric (Silk, Wool, Delicates): Alkaline cleaners damage protein fibers; chlorine bleach destroys colors. Check care labels.
-
Plastics/Acrylics: Solvents like acetone cause clouding or melting. Test in hidden area.
-
Human & Environmental Safety Protocol:
- Ventilation: Open windows or use exhaust fans with volatile cleaners (ammonia, solvents, bleach).
- PPE: Nitrile gloves (not latex) for acids, alkalis, solvents. Safety glasses for splatter risk.
- Storage: Keep in original containers, away from children/pets, segregated by chemistry (acids away from bleach!).
- Disposal: Never pour concentrated chemicals down drains. Follow local hazardous waste guidelines.
Mastering these three layers transforms cleaning from reactive chore to proactive system. Now, let’s dive deep into each cleaner category—how they work, where to use them, critical pitfalls, and smart alternatives.
Acids: The Precision Tools for Mineral Warfare
Acidic cleaners excel against inorganic, mineral-based soils. They work by donating hydrogen ions (H⁺) that react with alkaline mineral deposits (like calcium carbonate in limescale), converting them into water-soluble salts, water, and carbon dioxide gas (the fizz you see). Effectiveness depends on acid strength (pH), concentration, dwell time, and the specific mineral targeted.
The Chemistry Simplified: Why Acids Dissolve Minerals
Imagine limescale (calcium carbonate, CaCO₃) as a tightly locked fortress. An acid like acetic acid (in vinegar) acts as a key. The reaction:
CaCO₃ (solid limescale) + 2CH₃COOH (acetic acid) → Ca(CH₃COO)₂ (soluble calcium acetate) + H₂O (water) + CO₂ (gas bubbles)
The fortress crumbles into components that rinse cleanly away. Stronger acids (lower pH) work faster on tougher deposits but carry higher risks.
White Vinegar (5-8% Acetic Acid, pH ~2.5): The Household Workhorse
- Best Applications: Light limescale in kettles, coffee makers, showerheads; soap scum on tile/grout; deodorizing drains; removing light rust stains on chrome.
- Step-by-Step Protocol:
- For appliances: Fill reservoir with equal parts vinegar and water. Run full cycle. Repeat with plain water cycle to eliminate odor.
- For showerheads: Unscrew, submerge in bowl of undiluted vinegar for 30-60 minutes. Scrub gently with old toothbrush. Rinse thoroughly.
- For faucets: Soak paper towel in vinegar, wrap around faucet base, secure with rubber band. Wait 15 minutes. Wipe clean.
- Why It Works: Mild acidity safely dissolves light mineral deposits without harsh fumes. Acetic acid concentration is sufficient for household tasks yet gentle on chrome, glass, and ceramic (when used correctly).
- Critical Limitations & Mistakes:
- Never use on natural stone: Causes irreversible etching (dull, rough spots). Using vinegar on marble or limestone requires professional refinishing.
- Ineffective on heavy rust: Vinegar’s weak acidity cannot penetrate thick iron oxide deposits. Leads to frustrated scrubbing and potential surface scratching.
- Odor persistence: Vinegar smell lingers if not rinsed well. Add 5 drops of lemon essential oil to mask scent (does not enhance cleaning).
- Pro Enhancement: Boost power for tough jobs by adding 1 tablespoon citric acid powder per cup of vinegar. The citric acid chelates (binds) metal ions, preventing redeposit.
Citric Acid (Powder or Solution, pH ~2.2): The Odorless Specialist
- Best Applications: Descaling dishwashers/washing machines; removing hard water spots on glassware/windows; eco-friendly alternative where vinegar odor is undesirable; cleaning irons.
- Step-by-Step Protocol:
- Dishwasher: Place 2 tablespoons citric acid powder in detergent cup. Run empty hot cycle.
- Washing Machine: Add 1/2 cup citric acid to drum. Run hottest cycle available.
- Glass Spots: Dissolve 1 tablespoon powder in 1 cup warm water. Spray on glass, wait 5 minutes, wipe with microfiber.
- Why It Works: Citric acid is a chelating agent—it grabs onto calcium, magnesium, and iron ions, holding them in solution so they rinse away cleanly. Biodegradable, leaves zero residue, and has a neutral scent.
- Practical Insight: In commercial kitchens, citric acid is often preferred for equipment descaling due to its lack of odor transfer and consistent performance. Powder form provides reliable concentration compared to variable natural sources.
- Budget Note: Lemon juice contains citric acid but is less concentrated (~5% vs. powder’s near 100%), more expensive per use, and contains oils that can leave residue. Powder is cost-effective and consistent.
Commercial Lime Scale Removers (Phosphoric, Sulfamic, or Hydroxyacetic Acid, pH 1-2): The Heavy Artillery
- Best Applications: Thick limescale in toilet bowls; rust stains on porcelain; mineral buildup on shower enclosures; hard water deposits on shower doors.
- Step-by-Step Protocol:
- Ensure ventilation. Wear nitrile gloves and safety glasses.
- Apply gel formula to vertical surfaces (prevents runoff). For toilets, pour under rim.
- Dwell time: 5-15 minutes (follow product label; do not exceed).
- Gently scrub with non-abrasive pad (nylon brush). Rinse thoroughly with water.
- Why They Work: Stronger acids react faster and more completely with stubborn deposits. Phosphoric acid has an added benefit: it passivates metal surfaces after rust removal, creating a temporary protective layer against flash rusting.
- Critical Safety Imperatives:
- NEVER mix with bleach: Produces deadly chlorine gas. Symptoms include coughing, chest tightness, burning eyes. If accidental mixing occurs, evacuate area immediately, seek fresh air, call emergency services.
- Surface Testing: Always test on inconspicuous area first. Applying strong acid-based cleaners to vintage porcelain or delicate finishes without testing can cause irreversible damage.
- Metal Caution: Can corrode aluminum, cast iron, or uncoated steel. Avoid on these surfaces.
- When to Choose Commercial: When vinegar/citric acid fail after 2-3 attempts. The stronger formulation saves time and physical effort on severe buildup.
When Acids Fail: Understanding Limitations
- Soil Mismatch: Acids do nothing for grease, protein stains, or particulate dirt. Using vinegar on a greasy stovetop merely spreads oil.
- Surface Incompatibility: Beyond stone, avoid on:
- Waxed or oiled wood floors (strips finish)
- Certain grouts (can discolor unsealed cementitious grout)
- Electronics (corrosive to circuits)
- Neutralization Trap: Spraying vinegar after using a baking soda paste wastes both. The acid-base reaction neutralizes cleaning power instantly, leaving salt water.
DIY Acidic Cleaner Recipe: Enhanced All-Purpose Descaler
For light-to-moderate mineral deposits on glass, ceramic, chrome, or sealed tile. NOT for stone, aluminum, or wood.
– 1 cup distilled white vinegar
– 1 tablespoon citric acid powder
– 10 drops lemon or orange essential oil (optional, for scent only)
– Warm water to fill a 16-oz glass spray bottle (plastic can retain odor)
Shake well before each use. Spray generously on surface. Wait 5-10 minutes (do not let dry). Scrub gently with non-scratch sponge. Rinse thoroughly with clean water. For shower doors, wipe dry with microfiber cloth to prevent new water spots.
Bases (Alkaline Cleaners): The Masters of Grease and Organic Soils
Where acids conquer minerals, bases dominate organic soils—especially fats, oils, proteins, and carbohydrates. Alkaline cleaners work through two powerful mechanisms: saponification (chemically converting fats into soap) and emulsification (breaking oils into microscopic droplets suspended in water for easy rinsing). Most everyday cleaners—from dish soap to oven degreasers—are alkaline because grease is a universal household challenge.
The Chemistry Simplified: How Bases “Eat” Grease
Picture a glob of bacon grease. A strong base like sodium hydroxide (lye) initiates saponification:
Fat (Triglyceride) + NaOH (Sodium Hydroxide) → Soap (Sodium Salt of Fatty Acid) + Glycerol
The grease literally transforms into soap molecules, which are water-soluble. Milder bases (like dish soap) rely on surfactants—molecules with a hydrophilic (water-loving) head and hydrophobic (oil-loving) tail. These surround oil droplets, forming micelles that rinse away with water. This is emulsification.
Dish Soap (pH 7-10): The Daily Defense
- Best Applications: Hand-washing dishes; wiping greasy stovetops/countertops; pre-treating clothing stains; cleaning range hoods.
- Why It Works: Contains surfactants (e.g., sodium laureth sulfate) that reduce water’s surface tension, allowing it to penetrate and lift grease. Many formulas include enzymes (proteases, amylases) for food particle breakdown and chelating agents to soften water.
- Optimal Technique:
- For dishes: Use warm (not scalding) water. A dime-sized drop creates sufficient suds for a full sink. Hot water can “cook” proteins onto surfaces.
- For stovetops: Apply soap directly to damp sponge. Wipe in circular motions. Rinse sponge frequently. Finish with dry microfiber cloth.
- Common Pitfalls:
- Overuse: Excess soap leaves sticky residue attracting more dirt. Rinse surfaces twice.
- Wrong Water Temperature: Cold water reduces surfactant efficiency; boiling water can set protein stains.
- Surface Damage: Avoid on untreated wood (dries out finish) or natural stone (can leave film).
- Pro Tip: Create a “grease-fighting paste” by mixing dish soap with baking soda. The baking soda provides gentle abrasion and boosts alkalinity. Ideal for scrubbing sink basins or cooktop grates. Rinse thoroughly.
Baking Soda (Sodium Bicarbonate, pH ~8.3): The Gentle Multi-Tasker
- Best Applications: Deodorizing refrigerators, carpets, trash cans; gentle scrubbing of sinks, tubs, cookware; neutralizing acidic odors (sour milk, vomit); boosting laundry.
- How It Works: Mild abrasive physically lifts light soil. Its slight alkalinity neutralizes acidic odor molecules (converting them to less volatile salts). When dissolved in water, it creates a weak alkaline solution that helps break down light grease films.
- Effective Protocols:
- Deodorizing: Sprinkle generously on carpets, let sit 15+ minutes, vacuum thoroughly. Place open box in fridge.
- Scrubbing Paste: Mix 3 parts baking soda to 1 part water. Apply with damp cloth or sponge. Rinse well.
- Drain Freshening: Pour 1/2 cup down drain, followed by 1 cup vinegar. After fizzing stops, flush with hot water. (Note: The reaction cleans above the clog; not a drain opener).
- Limitations to Respect:
- Not a Heavy-Duty Degreaser: Lacks the alkalinity to saponify thick grease. Won’t clean a baked-on oven.
- Abrasive Potential: Can scratch polished surfaces (glass cooktops, high-gloss finishes) if scrubbed vigorously. Always use soft cloth.
- Residue: Leaves white powder if not rinsed completely. Critical on dark surfaces.
- Practical Insight: Maintenance professionals often use baking soda paste for safe removal of light scuffs from painted walls without damaging drywall—unlike harsher cleaners.
Washing Soda (Sodium Carbonate, pH ~11): The Laundry & Heavy-Duty Booster
- Best Applications: Boosting laundry detergent (especially in hard water); degreasing garage floors, grill tools, outdoor furniture; pre-soaking heavily soiled items.
- How It Works: Stronger alkali than baking soda. Softens water by binding calcium/magnesium ions, allowing detergents to work more efficiently. Provides significant grease-cutting power.
- Conversion Hack: Make washing soda by spreading baking soda on baking sheet. Bake at 400°F (200°C) for 1 hour. The heat drives off water and carbon dioxide, converting NaHCO₃ to Na₂CO₃. Cool before storing in airtight container.
- Usage Protocol:
- Laundry: Add 1/2 cup to wash cycle with detergent. Safe for colors and whites (unlike bleach).
- Degreaser: Dissolve 1/2 cup in 2 gallons warm water. Apply with stiff brush. Let sit 10 minutes. Scrub. Rinse thoroughly.
- Critical Caution: More caustic than baking soda. Wear gloves. Avoid contact with eyes. Not for aluminum surfaces (causes dark staining).
Oven Cleaners (Sodium Hydroxide/Lye-Based, pH 13-14): The Nuclear Option (Use Wisely)
- Best Applications: Baked-on grease and carbon deposits inside conventional ovens, on grill grates, or broiler pans.
- How They Work: Sodium hydroxide hydrolyzes fats at room temperature, turning them into water-soluble soap and glycerol. No scrubbing required for most buildup—chemistry does the work.
- Step-by-Step Safe Application:
- Remove oven racks. Clean separately with baking soda paste.
- Ensure kitchen is well-ventilated (open windows, turn on exhaust fan).
- Wear nitrile gloves and safety glasses. Cover nearby surfaces.
- Spray cool oven interior (avoid heating elements, sensors, or self-cleaning latch mechanisms). Apply thick, even coat.
- Close door. Wait exactly as directed (usually 15-45 minutes). Do not exceed time.
- Wipe away sludge with damp cloth or sponge. Rinse cloth frequently.
- Wipe again with clean water-dampened cloth to remove residue.
- Heat oven to 300°F (150°C) for 15 minutes to evaporate moisture before cooking.
- Non-Negotiable Safety Rules:
- NEVER use on self-cleaning ovens: Can damage the special enamel coating. Use manufacturer-recommended methods only.
- NEVER use on aluminum: Causes severe pitting and dark corrosion. Cover aluminum parts with foil before application if unavoidable.
- NEVER mix with acids: Violent reaction producing heat and splatter. Wait 24+ hours after acid cleaning before using oven cleaner.
- Skin/Eye Contact: Causes severe chemical burns. If contact occurs, flush immediately with lukewarm water for 15+ minutes. Seek medical attention.
- When to Avoid DIY: If oven has significant grease buildup near electrical components, or if you lack proper PPE/ventilation, hire a professional. Safety outweighs savings.
When Bases Backfire: Critical Limitations
- Surface Damage:
- Aluminum: Strong alkalis cause dark staining and pitting (e.g., oven cleaner on aluminum foil pan).
- Silk/Wool: Alkaline solutions hydrolyze protein fibers, causing weakening and yellowing. Use neutral pH cleaners.
- Unsealed Wood: Dries out and damages finish.
- Stain Setting: Using a base on tannin-based stains (wine, tea, coffee) can permanently set them by bonding the stain deeper into fabric fibers. Pre-treat tannin stains with a mild acid (diluted vinegar) first.
- Ineffective on Minerals: Bases will not remove limescale or rust. Attempting to scrub limescale with baking soda paste wastes effort and may scratch surfaces.
DIY Alkaline Cleaner Recipe: Heavy-Duty Degreaser (Non-Toxic Version)
For garage floors, workshop benches, grill tools, or greasy stovetop surfaces. Test on inconspicuous area first. Avoid aluminum.
– 1/2 cup washing soda (or homemade converted baking soda)
– 1/4 cup liquid castile soap (pure vegetable oil-based soap, pH ~10)
– 2 gallons warm water
– 10 drops tea tree essential oil (optional, adds mild antimicrobial property)
Stir until washing soda dissolves. Apply with stiff-bristled brush (nylon). Let dwell 10-15 minutes. Scrub vigorously. Rinse thoroughly with clean water. For vertical surfaces, thicken with 1 tablespoon cornstarch slurry.
Enzymes: Nature’s Precision Stain Assassins
Enzymatic cleaners harness biological catalysts—specialized proteins that accelerate the breakdown of specific organic molecules without being consumed in the process. Unlike acids or bases that rely on pH extremes, enzymes work at mild, neutral pH levels, making them exceptionally safe for fabrics, surfaces, and septic systems. Their power lies in specificity: each enzyme type targets a precise molecular structure.
The Biochemistry Made Simple: Enzymes as Molecular Scissors
Enzymes are substrate-specific. Think of them as custom-shaped scissors:
– Proteases: Cut protein chains (blood, egg, dairy, grass, sweat, pet urine proteins).
– Amylases: Cut starch chains (pasta, potatoes, gravy, baby food).
– Lipases: Cut fat/oil chains (butter, grease, lipstick, body oils).
– Cellulases: Cut cellulose fibers (helps release particulate soil trapped in cotton fabrics; also used in stone-washed denim production).
In a biological laundry detergent, multiple enzymes work synergistically. A grass stain contains chlorophyll (green pigment), proteins, and plant cellulose. Proteases dismantle the protein “glue,” amylases break down starch components, and cellulases loosen the cellulose fibers holding the stain. The fragments become small enough to rinse away. This targeted action prevents the need for harsh bleaches or hot water.
Biological Laundry Detergents: The Stain-Removing Powerhouse
- Best Applications: Clothing stained with food, blood, sweat, grass, dairy, baby formula, makeup. Essential for athletic wear, baby clothes, kitchen linens.
- Optimal Usage Protocol:
- Pre-treat: Apply undiluted liquid detergent directly to stain. Gently rub in. Let sit 5-15 minutes.
- Soak: For set-in stains, dissolve detergent in warm (not hot) water. Submerge garment. Soak 30 minutes to overnight.
- Wash: Use warm or cold water cycle. Critical: Water temperature must stay below 120°F (49°C). Heat denatures (unfolds) enzymes, rendering them inactive.
- Avoid: Chlorine bleach destroys enzymes. Use oxygen bleach (sodium percarbonate) if whitening/disinfecting is needed.
- Why They Excel:
- Enable effective cleaning in cold water (saves energy, protects fabrics).
- Break down odor-causing compounds at the source (unlike fragrances that mask smells).
- Gentle on colors and delicate fibers compared to chlorine bleach.
- Common User Errors:
- Using Hot Water: A frequent mistake. Enzymes deactivate above 120°F. Check your machine’s “warm” setting temperature.
- Mixing with Bleach: Chlorine bleach oxidizes enzyme proteins. Always use oxygen bleach alternatives.
- Insufficient Dwell Time: Enzymes need time to work. Rushing to wash reduces efficacy. Patience yields results.
- Pro Insight: For protein-based stains (blood, egg), avoid hot water entirely during pre-treatment. Hot water cooks the protein, bonding it permanently to fibers. Always start with cold water.
Pet Stain & Odor Eliminators: Beyond Masking Smells
- Best Applications: Urine, feces, or vomit accidents on carpets, rugs, upholstery, hardwood floors, tile grout.
- How They Truly Work: Quality enzymatic cleaners contain live bacterial cultures (e.g., Bacillus species) that produce enzymes on-site. These bacteria consume the organic compounds (urea, proteins, fats) causing the odor, digesting them into harmless byproducts (water, carbon dioxide). This eliminates the odor source—not just covers it with perfume.
- Critical Application Steps (Most Fail Here):
- Blot Immediately: Use paper towels or clean cloth to absorb as much liquid as possible. Press down firmly; do not rub (spreads stain deeper).
- Rinse with Cold Water: Dampen area with cold water. Blot again. Repeat 2-3 times to dilute and remove surface residue. Do not use vinegar or other cleaners first—they alter pH and can kill the bacteria/enzymes.
- Saturate Generously: Apply enzymatic cleaner until the padding underneath is damp (for carpets). Use enough to reach the source. Follow product dwell time (usually 10-15 minutes).
- Air Dry Naturally: Do not use heat (hair dryer, steam cleaner). Heat kills bacteria. Place fan nearby for airflow. Cover area with aluminum foil to prevent pets from re-soiling while drying.
- Repeat if Necessary: For old or severe stains, multiple applications may be needed as enzymes work layer by layer.
- Documented Success Pattern: For persistent pet odor issues, correct application—including thorough blotting, cold water rinse, deep saturation, and air drying—can eliminate odors by reaching the source material in padding or subfloor.
- Red Flags in Products: Avoid “enzymatic” cleaners with strong perfumes (masks rather than eliminates), high alcohol content (kills bacteria), or vague ingredient lists. Look for specific enzyme names (protease, amylase) or bacterial strains on the label.
Biological Drain Maintainers: Prevention Over Cure
- Best Applications: Monthly maintenance for kitchen and bathroom drains; septic system care; preventing slow drains.
- How They Work: Contain bacterial spores that activate in water. Bacteria colonize the pipe walls, producing enzymes (lipases, proteases) that digest organic sludge—hair, grease, soap scum, food particles—before it builds up into clogs.
- Protocol for Success:
- Use after clearing a clog (with a plumber’s snake, not chemical drain opener).
- Pour recommended amount down drain before bed. Let sit overnight (no water usage).
- Repeat monthly for maintenance.
- Advantages Over Chemical Openers:
- Safe for all pipes (PVC, copper, cast iron)—no corrosion risk.
- Eco-friendly; bacteria are naturally occurring.
- Cost-effective long-term prevention.
- Limitations: Will not clear an existing clog. For clogs, use mechanical methods first (plunger, auger), then follow with enzymes to prevent recurrence. Chemical drain openers (caustic or acidic) kill the beneficial bacteria—wait 48 hours after chemical use before applying enzymes.
When Enzymes Won’t Work: Knowing the Boundaries
- Non-Organic Stains: Enzymes ignore ink, dye, rust, wine (tannin), or mud stains. Use appropriate chemistry: solvents for ink, acids for rust, oxidizers for wine (test first!).
- Disinfectant Conflict: Quaternary ammonium compounds (“quats”) in many disinfectants deactivate enzymes. Clean with enzymes first, rinse thoroughly, then disinfect if needed.
- Temperature Sensitivity: As noted, heat destroys enzymes. Store products in cool, dark places. Discard if exposed to freezing or high heat.
- pH Sensitivity: Highly acidic or alkaline environments denature enzymes. Never pre-treat with vinegar or baking soda before enzymatic application.
The DIY Enzyme Cleaner Myth: A Critical Reality Check
Online recipes for “homemade enzyme cleaners” (fruit peels, sugar, water fermented for weeks) circulate widely. However, these lack scientific reliability for stain removal:
– Inconsistent Potency: Fermentation produces unpredictable enzyme concentrations. Commercial products are standardized for efficacy.
– Contamination Risk: Homemade batches can grow mold, yeast, or harmful bacteria—especially problematic for pet accidents or food surfaces.
– Ineffective for Stains: The weak enzymes produced (mainly from fruit acids) lack the targeted protease/lipase strength needed for protein/fat stains.
– Pest Attraction: Sugar content attracts insects or rodents if stored improperly.
Exception: Meat tenderizer (containing papain, a protease enzyme) mixed with cold water can pre-treat fresh protein stains (blood, egg) on washable fabrics. Make a paste, apply, wait 15 minutes, rinse with cold water, then launder. Test on hidden area first—can damage delicate fibers. For critical or valuable items, commercial enzymatic cleaners are rigorously tested and reliable.
Solvents & Oxidizers: Targeted Solutions for Stubborn Challenges
Beyond acids, bases, and enzymes, two additional cleaner categories solve niche but critical problems: solvents dissolve substances impervious to water-based cleaners, while oxidizers disinfect, whiten, and break down stubborn pigments.
Solvents: The “Like Dissolves Like” Principle in Action
Solvents work because molecules with similar polarity attract. Non-polar solvents dissolve non-polar substances (oils, waxes, adhesives). Always prioritize ventilation and fire safety—most solvents are flammable.
Isopropyl Alcohol (Rubbing Alcohol, 70%+): The Disinfecting & De-sticking Agent
- Best Applications: Disinfecting high-touch surfaces (doorknobs, light switches, phones); removing sticky residues (labels, tape, price tags); cleaning electronics screens (when diluted); refreshing dry-erase boards.
- How It Works: Denatures proteins in bacteria/viruses (disinfection). Evaporates quickly without residue. Dissolves adhesives through molecular affinity.
- Safe Application:
- Disinfecting: Use 70% solution (more effective than 90%—water content slows evaporation, increasing contact time). Apply to surface, let dwell 30 seconds, air dry.
- Sticky Residue: Dampen cloth (not surface directly to avoid seepage). Rub residue gently. Wipe clean with water-dampened cloth afterward.
- Critical Cautions:
- Flammability: Keep away from flames, sparks, or heat sources. Use in well-ventilated area.
- Surface Damage: Can cloud acrylic, damage some plastics (test first), dry out wood finishes. Avoid on untreated wood or leather.
- Electronics: Never spray directly. Apply to microfiber cloth first. Power off device.
Acetone: The Industrial-Strength Remover
- Best Applications: Removing superglue, nail polish, tar, or heavy adhesive residues; degreasing metal before painting; cleaning fiberglass.
- How It Works: Extremely powerful non-polar solvent. Breaks molecular bonds in adhesives and resins instantly.
- Non-Negotiable Safety Protocol:
- Use outdoors or in extremely well-ventilated area.
- Wear nitrile gloves (latex dissolves in acetone).
- Keep away from all ignition sources—highly flammable vapor.
- Apply sparingly with cotton swab to targeted area only.
- Surface Destruction Warnings:
- Melts Plastics: Will dissolve Styrofoam, acrylic, polycarbonate, and many painted surfaces instantly. Attempting to remove adhesives from plastic surfaces with acetone often causes irreversible damage.
- Damages Finishes: Strips varnish, lacquer, and paint. Use only on glass, metal, or ceramic where damage is acceptable.
- When to Avoid: For most household sticky residues, isopropyl alcohol or citrus-based solvents are safer and sufficient. Reserve acetone for extreme cases with proper precautions.
Citrus-Based Solvents (D-Limonene): The Greener Degreaser
- Best Applications: Cutting heavy grease on tools, garage floors, or engine parts; removing adhesives; eco-conscious degreasing.
- How It Works: Extracted from citrus peels, d-limonene is a powerful natural solvent. Biodegradable and less toxic than petroleum-based solvents.
- Usage Tips: Often thickened into gels for vertical surfaces. Apply, let dwell 5-10 minutes, wipe away. May leave oily residue—follow with soapy water rinse.
- Cautions: Can be a skin irritant (wear gloves). Strong citrus scent may trigger sensitivities. Test on surfaces first—can damage some plastics or finishes.
Oxidizing Agents: Bleach Beyond the Bottle
Oxidizers break chemical bonds by transferring oxygen atoms. This destroys color molecules (bleaching), kills microorganisms (disinfection), and breaks down organic matter.
Chlorine Bleach (Sodium Hypochlorite, 3-8%): The Disinfection Powerhouse
- Best Applications: Disinfecting bathrooms (toilets, sinks, tubs) during illness; whitening white cotton/linen laundry; removing mildew from grout or siding; sanitizing food-contact surfaces (diluted).
- Science of Action: Releases hypochlorous acid in water, which oxidizes proteins in microbes and chromophores (color molecules) in stains.
- Critical Usage Rules:
- Dilution is Mandatory: For disinfecting surfaces: 1/3 cup (5 tablespoons) bleach per gallon of water. For laundry whitening: 1/2 cup per load. Never use full strength—ineffective and dangerous.
- Dwell Time Matters: Surface must stay wet for 5-10 minutes to kill pathogens. Wiping dry immediately negates disinfection.
- Freshness: Bleach degrades in light/heat. Replace bottle 6 months after opening. Test potency: Pour small amount—vigorous bubbling indicates activity.
- Rinse After Use: On food surfaces or children’s toys, rinse thoroughly with water after dwell time to remove residues.
- The Deadly Mixes (Non-Negotiable):
- BLEACH + VINEGAR (or any acid): Produces chlorine gas. Symptoms: burning eyes, coughing, chest pain. Evacuate immediately. Call emergency services.
- BLEACH + AMMONIA (found in glass cleaners, urine): Produces chloramine gas. Symptoms: nausea, shortness of breath, chest pain. Chronic exposure linked to respiratory issues.
- BLEACH + RUBBING ALCOHOL: Produces chloroform (a toxic compound) and hydrochloric acid.
- Golden Rule: Never mix bleach with any other cleaner except plain water. Clean area with one product, rinse thoroughly, wait 24 hours, then use another if needed.
- Surface Damage Risks:
- Colors: Destroys dyes. Test on hidden area of colored fabrics.
- Metals: Causes rust/corrosion on steel, iron. Rinse metal surfaces immediately after use.
- Natural Fibers: Weakens cotton, linen, rayon over time. Avoid on silk, wool, spandex, leather.
Oxygen Bleach (Sodium Percarbonate): The Gentle Giant
- Best Applications: Soaking stained laundry (colors and whites); cleaning tile grout; brightening outdoor furniture; eco-friendly alternative to chlorine bleach; septic-safe.
- How It Works: Powder that fizzes in water, releasing hydrogen peroxide (oxidizer) and washing soda (alkaline booster). Hydrogen peroxide breaks down stains; washing soda enhances cleaning power.
- Advantages Over Chlorine Bleach:
- Safe for colors (when used as directed).
- No harsh fumes.
- Biodegradable; breaks down into water, oxygen, and soda ash.
- Safe for septic systems.
- Effective Protocols:
- Laundry Soak: Dissolve 1/2 cup in warm water. Submerge stained items. Soak 1-6 hours (or overnight for tough stains). Launder as usual.
- Grout Cleaning: Make thick paste with water. Apply to grout lines. Wait 15-30 minutes. Scrub with old toothbrush. Rinse.
- Deck/Patio: Dissolve 1 cup in gallon of warm water. Apply to surface. Wait 15 minutes. Scrub. Rinse thoroughly.
- Limitations: Less potent disinfectant than chlorine bleach. Not EPA-registered for killing certain pathogens (e.g., norovirus). For disinfection during illness per CDC guidelines, chlorine bleach solutions are necessary.
Navigating Critical Risks: Safety Protocols You Cannot Skip
Knowledge without safety is dangerous. This section addresses severe, under-discussed risks in household cleaning—and precise protocols to prevent them. Poison control centers report numerous incidents annually from cleaner misuse; prevention is entirely achievable through education.
The Chemistry of Danger: Why Mixing Cleaners Creates Hazards
Chemical reactions between common household cleaners produce toxic gases. Understanding the mechanism reinforces safe practices.
- Chlorine Gas (from Bleach + Acid):
- Reaction: NaOCl (bleach) + CH₃COOH (vinegar) → Cl₂ (chlorine gas) + other compounds
- Symptoms: Immediate burning eyes/nose/throat, coughing, chest tightness, nausea. High exposure causes pulmonary distress.
- Documented Risk: Mixing bleach with acidic toilet bowl cleaners (which often contain hydrochloric acid) is a frequent cause of emergency calls. Always read labels on all cleaning products.
-
Protocol: If accidental mixing occurs: 1) Evacuate everyone (including pets) immediately. 2) Open all windows/doors. 3) Do not re-enter until area is fully ventilated (30+ minutes). 4) Seek medical attention if symptoms occur. Call Poison Control (US: 1-800-222-1222).
-
Chloramine Gas (from Bleach + Ammonia):
- Reaction: NaOCl + NH₃ → NH₂Cl (monochloramine) + other toxic compounds
- Sources of Ammonia: Glass cleaners (e.g., Windex), urine (pet accidents, toilets), some floor waxes.
- Symptoms: Watery eyes, nausea, shortness of breath, chest pain.
-
Critical Scenario: Cleaning a pet accident? Never use bleach. Urine contains compounds that break down to ammonia. Use enzymatic cleaner only. Similarly, never clean a toilet with ammonia-based cleaner followed by bleach.
-
Peracetic Acid (from Hydrogen Peroxide + Vinegar):
- Reaction: H₂O₂ + CH₃COOH → CH₃COOOH (peracetic acid)
- Risk: Corrosive to skin, eyes, respiratory tract. Unstable for home use.
- Myth Busting: Despite viral “green cleaning” hacks, never store hydrogen peroxide and vinegar in the same spray bottle. Even sequential use on the same surface without thorough rinsing risks reaction.
E-E-A-T Safety Anchor: These reaction hazards are explicitly documented in Safety Data Sheets (SDS) for all major cleaning brands and emphasized in CDC and American Association of Poison Control Centers public advisories. Prevention is 100% achievable through education and protocol adherence.
Surface Damage: Preventing Costly Errors
- Etching on Natural Stone:
- Cause: Acid (vinegar, lemon, CLR) reacting with calcium carbonate in marble, limestone, travertine.
- Result: Permanent dull, rough spots where polish is eaten away. Cannot be wiped off.
- Prevention: Use only pH-neutral stone cleaners. For spills, blot immediately; never let acidic liquids sit. Seal stone annually per manufacturer guidance.
-
Repair Insight: Professional refinishing may be required; costs vary significantly by region and extent of damage.
-
Aluminum Corrosion:
- Cause: Strong alkalis (oven cleaner, washing soda) or acids reacting with aluminum oxide layer.
- Result: Dark staining, pitting, irreversible surface damage.
-
Prevention: Use cleaners labeled “safe for aluminum.” For cookware, use mild dish soap and non-abrasive pads. For outdoor furniture, use dedicated aluminum cleaner.
-
Fabric Damage:
- Chlorine Bleach on Spandex/Lycra: Causes yellowing and fiber degradation. Ruins athletic wear, swimsuits.
- Alkalis on Silk/Wool: Hydrolyzes protein fibers, leading to holes or weakness. Always use “delicates” detergent.
- Prevention: Read garment care labels. When in doubt, test cleaner on seam allowance first.
Health & Environmental Stewardship
- Ventilation is Non-Optional: Open windows. Use exhaust fans. For strong cleaners (oven cleaner, solvents), consider an N95 respirator. Symptoms of poor ventilation: headache, dizziness, eye irritation.
- Glove Selection Matters:
- Latex: Not chemical-resistant. Avoid.
- Vinyl: Thin; tears easily. Poor for solvents.
- Nitrile: Best all-around. Resists acids, bases, solvents. Reusable if rinsed.
- Eco-Impact Awareness:
- Phosphates: Banned in many areas; cause algal blooms. Choose phosphate-free detergents.
- Triclosan: Antibacterial agent linked to environmental concerns. Avoid.
- Microbeads: Plastic particles harming waterways. Banned in US but check imported products.
- Look For: EPA Safer Choice label, Ecologo certification, or full ingredient disclosure.
First Aid Protocol: Immediate Response Saves Harm
- Skin Contact: Remove contaminated clothing. Rinse affected area under lukewarm running water for at least 15 minutes. Do not use neutralizing agents (vinegar on base burns)—water only. Seek medical attention for strong acids/bases or persistent irritation.
- Eye Contact: Immediately flush eyes at eyewash station or under gentle running water for 15+ minutes, holding eyelids open. Roll eyes to ensure full coverage. Seek emergency medical care immediately—even if pain subsides.
- Inhalation: Move to fresh air immediately. Loosen tight clothing. If breathing is difficult, call emergency services. Do not induce vomiting.
- Ingestion: Do NOT induce vomiting. Rinse mouth with water. Drink small sips of water or milk if conscious and able to swallow. Call Poison Control immediately (US: 1-800-222-1222). Have product container ready.
Critical Reminder: Keep Poison Control number saved in your phone. Post it visibly near home phones. Seconds count in emergencies.
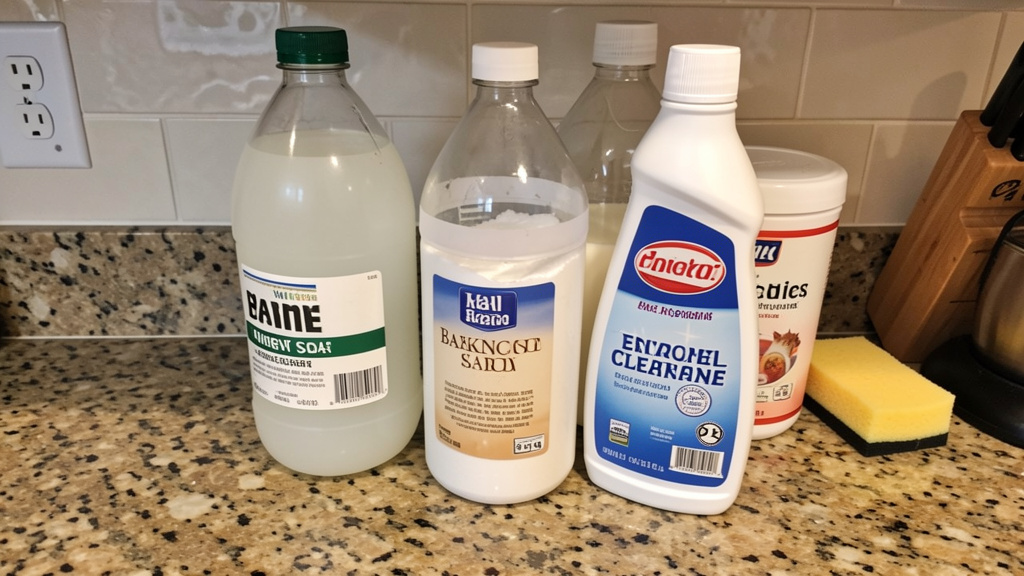
Building Your Minimalist, Maximum-Impact Cleaning Toolkit
You do not need 20 specialized bottles. With chemistry knowledge, five core items handle most household tasks. Customize based on your home’s specific needs.
The Essential Five (Plus Water)
- White Vinegar: For mineral deposits, deodorizing, glass cleaning (diluted). Store in glass or labeled plastic.
- Dish Soap (Clear, Fragrance-Free): For grease, general surfaces, pre-treating stains. Choose one with enzymes if possible.
- Baking Soda: For deodorizing, gentle scrubbing, neutralizing odors. Keep in shaker container.
- Isopropyl Alcohol (70%): For disinfecting, sticky residues, electronics. Store away from heat/flames.
- Enzymatic Cleaner: For organic stains, pet accidents, odor elimination. Choose reputable brand with specific enzymes listed.
Strategic Additions Based on Household Profile
- Hard Water Areas: Add citric acid powder for appliance descaling and preventing spots.
- Pet Owners: Keep oxygen bleach (for accident cleanup on fabrics) and a dedicated enzymatic cleaner on hand. Store away from pet areas.
- Natural Stone Surfaces: Invest in a pH-neutral stone cleaner. Never substitute vinegar or all-purpose cleaners.
- During Illness (Flu, Stomach Virus): Have EPA-registered disinfectant (check List N) or chlorine bleach specifically for disinfection. Use only when needed—overuse contributes to resistance.
- Workshop/Garage: Add citrus-based degreaser and dedicated aluminum cleaner if applicable.
Smart Storage & Organization Protocol
- Segregate by Chemistry: Store acids (vinegar) away from bleach. Store solvents in cool, ventilated area away from ignition sources.
- Original Containers Only: Never transfer cleaners to unmarked bottles (risk of accidental mixing or ingestion). If decanting for travel, label meticulously.
- Child/Pet Safety: Use under-sink locks. Store heavy items low to prevent falling. Keep in dedicated caddy for portability.
- Inventory Check: Every 6 months, discard expired products (bleach loses potency; hydrogen peroxide stops bubbling). Wipe down shelves.
When to Call a Professional
- Severe Mold Growth (>10 sq. ft., hidden behind walls): Requires containment and HEPA filtration to avoid spore spread.
- Chemical Spills (large quantities of strong acids/bases): Evacuate, ventilate, call hazardous materials team.
- Surface Damage Repair: Etched stone, corroded metal, set-in stains on valuables. Professionals have specialized tools and compounds.
- Persistent Odors: May indicate hidden source (e.g., moisture intrusion). Restoration companies use specialized equipment for detection and remediation.
Your Questions, Answered: Real Concerns from Real Homes
Q: I’ve heard vinegar and baking soda create a powerful cleaner when mixed. Is this true?
A: This is a persistent myth. When combined, vinegar (acid) and baking soda (base) undergo an acid-base reaction: CH₃COOH + NaHCO₃ → CH₃COONa + H₂O + CO₂. The result is sodium acetate (salt), water, and carbon dioxide gas (the fizz). The cleaning power of both ingredients is neutralized instantly. The fizz is visually satisfying but chemically counterproductive. For best results, use them sequentially: vinegar first to dissolve minerals, rinse, then baking soda paste to scrub and deodorize.
Q: Are “green,” “natural,” or “non-toxic” labeled cleaners always safer?
A: Not necessarily. “Natural” is unregulated marketing language. Citrus oils (limonene) can be skin irritants. Vinegar is natural but corrosive to stone. Conversely, many synthetic cleaners undergo rigorous safety testing. Focus on: 1) Full ingredient disclosure, 2) Third-party certifications (EPA Safer Choice, Ecologo), 3) Safety Data Sheets (SDS) availability. A product labeled “plant-based” may still contain sensitizing fragrances. Read beyond the label.
Q: Why does my stainless steel sink have streaks or water spots after cleaning?
A: Streaks are usually residue from cleaners, hard water minerals, or improper drying. Protocol: 1) Clean with mild dish soap and warm water. 2) Rinse thoroughly with clean water. 3) Immediately dry with a soft, lint-free microfiber cloth using straight strokes (not circles). For existing spots, use a dedicated stainless steel cleaner or make a paste of baking soda and water; rub with the grain, rinse, dry. Avoid chlorine bleach or steel wool—they scratch and cause rust spots.
Q: Can I substitute lemon juice for vinegar in cleaning recipes?
A: For light tasks (deodorizing, light grease), yes—but with caveats. Lemon juice (citric acid, pH ~2) is slightly less acidic than vinegar (acetic acid, pH ~2.5) and contains natural oils that can leave residue on surfaces. It’s also significantly more expensive per ounce. Crucially, never use on natural stone—citric acid etches marble just like vinegar. For descaling kettles or coffee makers, citric acid powder is more effective and economical than lemon juice.
Q: What’s the absolute safest way to remove hard water stains from glass shower doors?
A: Step-by-step: 1) Spray undiluted white vinegar generously on stains. 2) Wait 10-15 minutes (do not let dry). 3) Scrub gently with a non-abrasive sponge (melamine foam “magic eraser” works but use lightly to avoid micro-scratches). 4) Rinse thoroughly with warm water. 5) Wipe dry immediately with microfiber cloth. For stubborn stains, use a commercial lime scale remover tested on a corner first. Prevention: Squeegee doors after every shower; apply a rain-repellent product (like automotive glass treatment) to create a barrier.
Q: Is hydrogen peroxide safe for colored fabrics? How do I test it?
A: 3% hydrogen peroxide is generally color-safe, but testing is essential. Protocol: Dampen a hidden area (seam allowance, inside hem). Apply a drop of peroxide. Wait 5 minutes. Blot dry. Check for color change or weakening. If none, proceed. For stain removal: Dab (do not rub) peroxide onto stain. Wait 5-10 minutes. Rinse thoroughly. Never mix with vinegar. Note: Peroxide can weaken elastic fibers over time—avoid on spandex blends.
Q: Why do some cleaners explicitly say “do not use on aluminum”? What happens if I do?
A: Aluminum has a protective oxide layer. Strong acids (vinegar, lime removers) or bases (oven cleaner, washing soda) corrode this layer, causing pitting, dark staining, or white powdery deposits. Always use cleaners labeled “safe for aluminum” or mild soap and water. For oxidation, use a dedicated aluminum brightener following label instructions precisely.
Q: Can enzymatic cleaners be used in High-Efficiency (HE) washing machines?
A: Yes—and they’re ideal. HE machines use less water, so proper dosage is critical. Use the amount specified on the enzymatic detergent label (often less than standard machines). Avoid fabric softeners—they coat fibers and reduce enzyme effectiveness. For pre-soaking in HE machines, use the “soak” cycle if available, or dissolve detergent in warm water first before adding to drum.
Q: What’s the difference between sanitizing and disinfecting? When do I need each?
A: Sanitizing reduces bacteria on surfaces to levels deemed safe by public health codes (e.g., kitchen counters, cutting boards). Achieved with weaker solutions or shorter contact times. Disinfecting destroys or irreversibly inactivates both bacteria and viruses (and sometimes fungi) on hard, non-porous surfaces (e.g., doorknobs during flu season, bathroom surfaces after illness). Requires stronger chemicals (like diluted bleach) and longer dwell times (check product label—often 3-10 minutes of surface wetness). For most homes, regular cleaning suffices. Disinfect only when someone is sick or for high-risk surfaces per CDC guidance.
Q: How long do cleaning products remain effective? When should I replace them?
A: Shelf life varies:
– Bleach: 6 months after opening (degrades with light/heat). Test: Pour small amount—if no vigorous bubbling, discard.
– Hydrogen Peroxide: 6-12 months. Test: Pour on cut potato—if no bubbling, inactive.
– Enzymatic Cleaners: 1-2 years. Discard if cloudy, separated, or smells sour.
– Vinegar/Baking Soda: Indefinite if stored properly (cool, dark place). Baking soda loses deodorizing power over years—replace annually for odor control.
Store all products tightly sealed, away from heat and sunlight to maximize potency.
Q: Are DIY cleaners as effective as commercial products?
A: For light cleaning (vinegar for glass, baking soda for deodorizing), yes. For heavy-duty tasks (oven grease, rust removal, disinfection), commercial products are engineered for efficacy, stability, and safety. DIY mixes lack preservatives (risk of bacterial growth in vinegar-water sprays), consistent concentration, and safety testing. Research published in infection control journals indicates homemade disinfectant solutions often fail to achieve required pathogen kill rates. When health or surface integrity is at stake (disinfection, stone care, set-in stains), trusted commercial products provide reliability. Use DIY for routine maintenance; commercial for challenges.
Q: How should I dispose of leftover or expired cleaning products safely?
A: Never pour down drains, toilets, or storm sewers. Chemicals can damage pipes, harm septic systems, or pollute waterways. Protocol:
1. Use it up following label instructions if safe and needed.
2. Donate unopened, usable products to community centers, shelters, or schools (call first).
3. Household Hazardous Waste (HHW) Program: Most municipalities offer collection days or permanent facilities. Visit Earth911.com or call local waste authority for locations.
4. Small Quantities: For non-hazardous residues (diluted vinegar, baking soda solution), rinsing down drain with copious water is generally acceptable. When in doubt, use HHW disposal. Proper disposal protects wastewater treatment workers and ecosystems.
Conclusion: Cleaning as an Act of Knowledge, Care, and Confidence
Cleaning is rarely just about dirt. It’s about creating a space that feels safe, healthy, and welcoming. It’s about protecting surfaces you’ve invested in. It’s about safeguarding the people and pets who share your home. This guide reframes cleaning from a chore defined by products into a practice defined by understanding. You now hold a framework—Soil Identification, Chemistry Matching, Safety Assessment—that turns uncertainty into empowered action.
You know why vinegar fizzes on limescale but fails on grease. You understand why enzymes need time and cold water to work their magic. You recognize the non-negotiable boundaries: never mix bleach and acid, never use vinegar on marble, always prioritize ventilation. This knowledge is portable. It applies whether you’re facing a mysterious stain on a heirloom rug, maintaining a new stone countertop, or simply wanting to reduce clutter under your sink.
Recap: Three Anchors to Carry Forward
- Diagnose Before You Clean: Spend 10 seconds identifying the soil type. This single step prevents wasted effort, surface damage, and frustration. Grease? Base. Rust? Acid. Pet accident? Enzyme. Mold? Oxidizer.
- Respect the Chemistry: Cleaners are tools with specific purposes. Using the right tool correctly yields better results with less effort. Forcing the wrong tool causes harm.
- Safety is the Foundation: Ventilation, gloves, segregation, and never mixing cleaners aren’t optional extras—they’re the bedrock of responsible cleaning. Your health and home depend on it.
The 24-Hour Rule: One Small, Powerful Action
Knowledge unused fades. Within the next 24 hours, choose one actionable step:
– Audit Your Cabinet: Remove expired products. Group cleaners by chemistry (acids together, bleach separate). Discard unlabeled containers. Wipe shelves clean.
– Solve One Persistent Problem: Identify a recurring cleaning challenge (cloudy shower door, sticky cabinet handles). Apply the Three-Layer Framework. Document the result.
– Share One Safety Tip: Tell a family member, roommate, or friend: “Never mix bleach and vinegar—it creates toxic gas.” Knowledge shared multiplies impact.
The Ripple Effect
Every informed choice you make ripples outward. Choosing the right cleaner reduces chemical waste. Understanding surface care extends the life of your belongings. Prioritizing safety protects your loved ones. Cleaning transforms from a task you endure into an intentional act of stewardship—for your home, your health, and your peace of mind. You are no longer guessing. You are equipped.
Explore Our Complete Home Care System:
The Science of Stain Removal: A Fabric-by-Fabric Master Guide | Non-Toxic Disinfection: What Actually Works (and What’s Hype) | Sustainable Cleaning Swaps: Effective, Affordable, Eco-Conscious | Deep Cleaning Your Kitchen: A Room-by-Room Protocol | Bathroom Restoration: From Grout to Faucets in 90 Minutes | Home Maintenance Calendar: Seasonal Tasks to Protect Your Investment