Move beyond fleeting craft trends: Cultivate curiosity, capability, and genuine connection through developmentally aware projects that honor your child’s unique pace, interests, and growing sense of self—without depleting your energy or space.
Picture the quiet focus as small hands press a feather onto recycled cardboard, the triumphant grin when a lopsided clay mug emerges from the oven, or the gentle pride in gifting a handmade card. These moments hold quiet significance. They offer opportunities for neural pathways to strengthen, emotional resilience to develop, and a child to internalize a quiet truth: Your ideas have value. Your effort matters. You are capable. This guide reframes DIY not as another task to check off, but as intentional connection—grounded in observable child development principles, prioritizing safety without sacrificing joy, and offering adaptable pathways for every age, space, and rhythm of family life. Whether you have ten minutes or a slow afternoon, discover how everyday materials become invitations to wonder, and how your role shifts from director to curious co-explorer.
Introduction: Beyond the Craft Checklist
In a landscape filled with perfectly curated project images and algorithm-driven activity suggestions, the simple act of creating together carries quiet counter-cultural weight. Yet many caregivers recognize familiar tensions: the elaborate kit abandoned after minutes, the glitter scattered beyond containment, or the whispered, “I can’t do it.” These are rarely failures of the child—or of you. They often signal a mismatch between the activity’s demands and the child’s current developmental readiness, emotional state, or intrinsic motivation. Meaningful creative engagement flourishes not from replicating flawless results, but from aligning projects with how children naturally learn, explore, and find meaning.
This perspective draws upon widely recognized frameworks in child development—including Montessori’s emphasis on purposeful work within a prepared environment, Vygotsky’s concept of the “zone of proximal development” (where challenge meets supportive scaffolding), and contemporary understanding of growth mindset. Each suggested activity integrates observable developmental considerations: sensory exploration for toddlers, narrative play for preschoolers, sequential problem-solving for school-aged children. Safety considerations are woven throughout using globally referenced standards: material safety verification (AP/CE seals), choking hazard awareness aligned with common regulatory guidelines, and ergonomic setup principles to reduce frustration. This approach isn’t about perfectionism; it’s about respect—for your child’s journey, your time, and the profound learning embedded within sticky fingers and joyful mess. The focus shifts from the finished object to the experience itself: where mistakes become data, not disasters, and “I made this” echoes long after the materials are stored away.
The “Connect & Create” Framework: Three Layers for Sustainable Engagement
Forget overwhelming checklists. Joyful, sustainable DIY with children rests on three interwoven layers. Master these, and you’ll intuitively adapt any project to your child’s needs. Skip one, and friction often follows. This framework transforms scattered attempts into a coherent, compassionate practice you can apply consistently.
Layer 1: Child-Centered Project Selection (The “Why Before How”)
Choosing a project based solely on aesthetics or trends is like planting seeds in compacted soil. Growth requires fertile ground: your child’s current interests, capabilities, and emotional landscape. This layer invites three gentle reflections before gathering supplies:
- What captures their curiosity right now? Is your child immersed in dinosaurs, weather patterns, helping in the kitchen, or building blanket forts? Anchor the project there. A dinosaur enthusiast might create a “dino dig site” with painted stones buried in kinetic sand. A child fascinated by communication might craft envelopes and stamps for a home post office. This leverages intrinsic motivation—the most reliable driver of sustained engagement. Example: Instead of a generic paper plate mask, a child captivated by ocean ecosystems might craft a jellyfish mobile using tissue paper tendrils and a recycled container—transforming a simple craft into a narrative-rich exploration.
- Where are they developmentally today? Match complexity to current capability. A toddler’s project should emphasize sensory input and large motor movements (scooping, pouring, smearing). A preschooler thrives with simple sequencing (“First glue the eyes, then the nose”). An 8-year-old seeks mastery through multi-step processes with tangible outcomes (weaving a bookmark, building a functional bird feeder). Critical nuance: Development isn’t linear. A child may be advanced verbally but still developing fine motor control. Observe their pace, not an idealized chart. Counter-example: Offering intricate beadwork requiring precise pincer grasp to a frustrated 4-year-old may invite discouragement. Providing larger wooden beads with a stiff cord respects current ability while gently building toward future skill.
- What is their emotional capacity in this moment? This is the most overlooked filter. Is your child well-rested and curious? Or tired, hungry, or emotionally dysregulated after a challenging day? On high-stress days, pivot to low-demand, sensory-regulating activities: cloud dough play, tearing paper for collage, or sorting colorful pom-poms. Forcing a complex project during emotional overwhelm can reinforce avoidance. Practical adaptation: Keep a “Calm Creation Kit” ready—a small bin with kinetic sand, smooth stones for painting, or pre-cut felt shapes. When tension rises, this becomes a soothing reset tool, not another demand.
The Guiding Insight: The most resonant DIY project isn’t defined by aesthetic perfection—it’s the one that meets your child exactly where they are today, honoring their interests, abilities, and emotional state with patience and presence.
Layer 2: Safe & Supportive Creative Setup (The Environment as Partner)
Maria Montessori observed that the prepared environment teaches as powerfully as the adult. Your setup communicates volumes: “This space invites your exploration,” or “This requires constant caution.” Intentional preparation minimizes friction, fosters independence, and embeds safety seamlessly.
-
The Physical Space: Zones Over Rooms
A dedicated craft room isn’t required. Create adaptable micro-zones:- The Mess-Embrace Zone: For paint, clay, or textured materials. Use a vinyl tablecloth clipped to the table, a shallow plastic bin as a “containment tray” for supplies, and an old shower curtain on the floor. Store supplies in clear, labeled bins (pictures for pre-readers). Keep a “cleanup caddy” nearby with damp cloths, a small hand broom, and a spray bottle of diluted vinegar solution. Why it works: Clear boundaries reduce anxiety about mess. Children learn spatial responsibility (“Materials stay inside the tray”).
- The Quiet Focus Zone: For detailed work like bead threading or puzzle assembly. A small tray on a low table, away from high-traffic areas. Include a magnifying glass, adjustable clip lamp, and noise-reducing headphones if sensory sensitivity is a consideration. Why it works: Minimizes distractions, signaling time for deep concentration.
- The Mobile Creation Station: A rolling cart with three tiers: top for current project supplies, middle for tools (child-safe scissors, glue sticks), bottom for works-in-progress. Roll it to the kitchen while you prepare meals or the living room during quiet time. Why it works: Integrates creativity into daily rhythms without permanent clutter. Empowers children to access materials independently.
-
Material Curation: Safety as Foundational
Safety isn’t an add-on; it’s the bedrock. Implement these universal considerations:- Toxicity: Prioritize materials labeled AP (Approved Product) by ACMI or CE marked. For homemade playdough or paint, use only food-grade ingredients (even if not intended for consumption). Avoid borax-based slime recipes; consider alternatives using saline solution or liquid starch with verified safety information.
- Choking Hazards: For children under 3 (or those who mouth objects), avoid items smaller than a toilet paper tube’s inner diameter. Use large pom-poms, chunky crayons, and jumbo beads. Maintain close supervision with any small parts.
- Tool Safety: Choose spring-loaded, blunt-tip scissors designed for small hands. Glue sticks are often preferable to liquid glue for toddlers (less mess, lower ingestion risk). For woodworking with older children, begin with hand tools (sandpaper blocks, clamps) before considering battery-operated tools under direct, informed supervision.
- Allergy Awareness: Note common sensitivities. Offer wheat-free playdough recipes (arrowroot or cornstarch-based) if gluten is a concern. Provide washable markers instead of strongly scented options for children sensitive to odors. Pro Tip: Create a simple “Material Note” for your child—a card listing known sensitivities to share with caregivers during creative time.
-
The Adult’s Role: Facilitator, Not Director
Shift language from commands to invitations:- Instead of “Color inside the lines,” try “I notice you’re using so many colors! Tell me about your picture.”
- Instead of fixing a wobbly tower, ask “What could make it more stable? Should we try a wider base?”
- When frustration arises: “It’s okay to feel stuck. Would you like a short break, a different tool, or my help with just this part?”
This nurtures agency. Your calm, present engagement—not perfection—is the anchor.
Layer 3: Cultivating a Process-Over-Product Mindset (The Heart of Connection)
This layer addresses the subtle pressure many feel: the expectation of a display-worthy result. Releasing this transforms DIY from performance to partnership. The magic lives in the doing, not the done.
-
Reframe “Mistakes” as Discoveries
A spilled paint puddle becomes “Look how the colors swirl together! What does it remind you of?” A torn paper edge inspires “How can we turn this tear into part of the design—a river, a path?” Share your own gentle “happy accidents”: “Oops, I glued the wing upside down! Now our bird has a joyful dance move.” This normalizes imperfection as part of creation. Insight from educational research: Children encouraged for their effort and strategies (“You worked so hard on that!”) often develop greater resilience than those praised solely for innate traits (“You’re so smart!”). Focus comments on their process: “I saw how carefully you measured the string,” or “You tried three ways to make that stand up—that’s creative problem-solving!” -
Document the Journey, Not Just the Artifact
Capture a photo of hands mixing dough, not just the baked result. Record a brief audio clip of your child describing their Lego creation while building it. Keep a “Creation Journal”—a simple notebook where you jot their words (“This rocket flies to the moon to visit my cat!”) beside a sketch or photo. Years later, these capture fleeting moments of growth far more meaningfully than the (often discarded) craft itself. Emotional impact: This validates their experience. They feel seen in their effort, not just judged on the output. -
Honor Completion (or Pause) with Dignity
Some projects will be set aside. That’s valuable information, not failure. Gently ask: “Shall we place this in the ‘Pause Box’ to revisit later, or is it time to compost the paper?” For finished pieces, involve the child in deciding their path: “Where shall we display this? On the fridge for a week, then in your memory box?” Avoid accumulating everything; curate a few meaningful pieces together. This teaches discernment and reduces clutter. Meaningful ritual: At year’s end, review the “memory box” together. “Remember creating this at age 5? Look how your cutting skills have grown!” This builds a tangible narrative of capability and growth.
Age-by-Age Project Guide: Aligning Activities with Developmental Readiness
Generic “crafts for kids” lists overlook fundamental developmental differences. This guide offers projects attuned to cognitive, motor, and emotional stages, with why it works, adaptable pathways, and safety considerations. Each includes three approaches: Ideal Path (optimal setup), Budget Path (common household items), and Quick Connection Path (under 15 minutes).
Toddlers (Ages 1-3): Sensory Exploration and Emerging Motor Skills
At this stage, learning happens through touch, sound, movement, and safe exploration. Projects should be sensory-rich, open-ended, and focus on cause-and-effect. Fine motor skills are emerging; activities should use whole-hand movements before refining to pincer grasp. Engagement is often brief; adult involvement is close and supportive.
Project 1: Edible Finger Paint Exploration
Why it works: Eliminates toxicity concerns while engaging multiple senses. Smearing builds shoulder stability and hand strength foundational for future writing. Color mixing introduces early science concepts. The edible nature reduces anxiety around mouthing—a typical developmental behavior.
* Ideal Path: Blend 1 cup plain yogurt with 2 tbsp cornstarch. Divide into small bowls. Add natural colorants: beet juice (pink), turmeric (yellow), spinach juice (green). Provide large paper on a tray, plus textured tools: silicone brushes, potato mashers, or celery stalks for stamping.
* Budget Path: Use plain Greek yogurt straight from the tub. Skip coloring; focus on the sensory experience of spreading. Offer spoons, fingers, or crumpled paper for application.
* Quick Connection Path: Scoop yogurt onto a highchair tray. Let them explore spreading with hands. Narrate gently: “Cool! Smooth! You’re making circles!” Cleanup becomes part of the shared experience—wipe the tray together.
Safety & Adaptation: Always supervise closely. For dairy allergies, use unsweetened applesauce thickened with arrowroot powder. Avoid honey-based mixtures for children under 1. Place a splash mat under the highchair. Gentle Reminder: Celebrate the sensory exploration itself—not representational art. “You’re feeling how slippery it is!”
Project 2: Contact Paper Sticky Wall
Why it works: Develops emerging fine motor skills (peeling, placing), spatial reasoning (“Where does this go?”), and cause-and-effect understanding. The vertical surface promotes wrist extension, strengthening muscles needed for future writing. Endlessly adaptable to current fascinations.
* Ideal Path: Tape a large sheet of clear contact paper (sticky side out) to a wall or easel. Prepare a tray with lightweight, safe items: tissue paper squares, feathers, yarn scraps, large sequins, silk leaves. Demonstrate peeling backing and pressing onto the sticky surface.
* Budget Path: Use a clean window. Gather fallen leaves, flower petals, or torn magazine pictures. Tape items directly to the glass with masking tape (less sticky, easier removal).
* Quick Connection Path: Cut contact paper into small 6×6 inch squares. Stick to a baking sheet. Offer just 3-4 items (e.g., three pom-poms, two feathers). Perfect for short attention spans.
Safety & Adaptation: Ensure all items are too large to pose a choking hazard. Supervise closely to prevent contact paper from being peeled and mouthed. For children who dislike sticky sensations, offer tongs or a spoon to place items. Developmental Note: Toddlers may simply pat items repeatedly—that’s valuable sensory input! Follow their lead without rushing toward a “finished picture.”
Project 3: Sensory Calm-Down Bottles
Why it works: Provides visual tracking practice, introduces concepts of motion and density (heavy glitter sinks slowly), and serves as a co-regulation tool during big emotions. The predictable, slow movement can be inherently calming for the nervous system.
* Ideal Path: Fill a clean, sturdy plastic bottle (label removed) ¾ full with clear corn syrup or baby oil. Add glitter, small waterproof toys (plastic beads, tiny dinosaurs), and a drop of food coloring. Seal lid permanently with strong adhesive (e.g., E6000) after filling. Wrap duct tape around the lid seam for extra security. Shake and observe together.
* Budget Path: Use water instead of syrup (glitter settles faster). Add a drop of dish soap to slightly slow the glitter. Seal lid tightly with hot glue. Crucial: Only use under direct supervision if the seal isn’t permanent; better suited for adult-made demonstration bottles.
* Quick Connection Path: Make a simple “I Spy” bottle: Fill a small water bottle with rice or dried beans and 2-3 tiny hidden objects (a red bead, a green button). Seal permanently. Shake and hunt for the items.
Safety & Adaptation: Essential: Bottles must be permanently sealed for toddler use. Glass is not recommended. Test the seal vigorously before giving to a child. For children prone to throwing, use only during seated, supervised sessions. Emotional Application: When your toddler is upset, sit quietly together and shake the bottle. “Let’s watch the glitter settle, just like our bodies can settle.” Pair the sensory tool with gentle emotional vocabulary.
Preschoolers (Ages 3-5): Imagination, Storytelling, and Foundational Skills
Preschoolers thrive in rich imaginative worlds. Projects should fuel storytelling, introduce simple sequencing (“first, next, last”), and build foundational skills like cutting on lines, gluing precisely, and following 2-3 step directions. Pride in “doing it myself” is strong; projects should offer achievable independence with gentle support. Collaborative play begins to emerge.
Project 1: Cardboard Box Puppet Theater
Why it works: Transforms creation into sustained imaginative play. Building the theater develops spatial reasoning and tool awareness (with help). Creating puppets refines cutting and decorating skills. Performing stories builds narrative skills, vocabulary, and emotional expression (“How does the dragon feel?”). Offers infinite replay value.
* Ideal Path:
Theater: Cut a large window in the front of a medium cardboard box (appliance box ideal). Cover box with contact paper or paint. Add curtains: glue fabric scraps to a dowel rod threaded through holes at the top of the window. Decorate exterior with markers, washi tape, or glued-on shapes.
Puppets: Cut simple shapes from felt (animals, people). Glue to craft sticks. Add details with fabric scraps, yarn hair, or googly eyes (supervised gluing).
Performance: Help brainstorm a simple story (“The lost kitten finds home”). Encourage voicing characters.
* Budget Path: Use a cereal box for a mini-theater. Cut window, decorate with crayons. Puppets: Draw characters on paper plates, glue to sticks. Curtains: Tape two paper towels together, color them, attach with tape.
* Quick Connection Path: Turn a paper lunch bag inside out. Draw a face on the bottom flap. Instant puppet! Perform a 2-minute story: “Hello! I’m Mr. Bag. I’m looking for my lost cookie…”
Safety & Adaptation: Pre-cut complex shapes (like the theater window) for younger preschoolers; let them decorate. Use child-safe scissors with spring handles. For children overwhelmed by open-ended creation, provide simple stencils for puppet shapes. Pro Tip: Record their puppet show. Watching themselves perform builds confidence. Gentle Reminder: Your role is supportive: “Hold this corner while I tape,” not “Let me do the hard part.” Offer choices: “Should the roof be red or blue?”
Project 2: Nature Collage on Contact Paper
Why it works: Bridges outdoor exploration with indoor creation. Sorting collected items (leaves by size, flowers by color) builds early math and science skills. Pressing items onto sticky paper develops fine motor control and spatial planning (“Where should this big leaf go?”). Celebrates seasonal awareness and appreciation for natural beauty.
* Ideal Path: Go on a “texture hunt” walk: collect smooth stones, rough bark pieces, soft petals, feathery grasses. Back home, tape contact paper (sticky side out) to a table. Arrange items freely. Once satisfied, carefully place a second sheet of contact paper on top (sticky side down) to seal the collage. Trim edges. Hang in a window.
* Budget Path: Use a piece of clear packing tape (sticky side up) on a table. Arrange tiny items (petals, small leaves) directly onto the tape. Cover with another piece of tape. Creates a bookmark-sized collage.
* Quick Connection Path: After a walk, sit at the kitchen table with a glue stick and paper. “Let’s glue our favorite treasure from today.” Focus on one special item—a unique leaf, a pretty stone taped to the page.
Safety & Adaptation: Discuss “taking only what’s fallen” to respect nature. Wash hands after handling soil/rocks. Avoid toxic plants (poison ivy, oleander). For children with sensory sensitivities to dirt, offer gloves or focus on collecting smooth, clean items like pinecones. Developmental Boost: Ask open-ended questions: “Why did you put the shiny stone next to the fuzzy leaf?” Encourages descriptive language and intentional design.
Project 3: Homemade Playdough Station
Why it works: Kneading, rolling, and shaping dough builds crucial hand strength and dexterity for future writing. It’s a powerful sensory regulator—calming for anxious children, alerting for lethargic ones. Open-ended play fosters creativity without “right/wrong” pressure. Making the dough together adds a simple cooking/science element.
* Ideal Path:
Dough: Mix 2 cups flour, ½ cup salt, 2 tbsp cream of tartar, 2 tbsp oil, 1.5 cups boiling water (adult handles this step!), food coloring. Stir, cool, knead. Store in airtight container.
Station: Set up in a bin: dough, cookie cutters, plastic knives, rolling pin, googly eyes, pipe cleaners, beads. Add themed props: toy dinosaurs for a “dino dig,” plastic letters for “dough words.”
* Budget Path: Use store-bought playdough. Gather tools from kitchen: garlic press (for “hair”), potato masher, measuring cups. No special tools? Use fingers only—pinch, roll snakes, flatten pancakes.
* Quick Connection Path: Make “dough balls”: Give child a small ball of dough. Challenge: “Can you make it smooth? Now bumpy! Now a snake!” Focus on sensory manipulation, not creation.
Safety & Adaptation: For wheat allergies, use gluten-free flour or a cornstarch-based recipe (1 cup cornstarch, ½ cup conditioner). Supervise closely with small add-ins (beads) for children who mouth objects. Troubleshooting Tip: If dough is sticky, knead in more flour. If crumbly, add a few drops of water. Involve child in fixing it—”Our dough needs a little more flour medicine!” Why it Endures: Unlike single-use crafts, a playdough station offers daily, adaptable creative time. Rotate tools weekly to maintain novelty.
Early Elementary (Ages 6-8): Building Confidence and Sequential Thinking
Children in this stage crave competence. They can follow multi-step instructions, understand basic cause-and-effect in projects, and take pride in creating functional items. Projects should offer clear milestones (“Step 1: Cut the cardboard”), opportunities for personalization, and tangible results they can use or gift. Mistakes may trigger frustration; emphasize problem-solving over perfection.
Project 1: Painted Rock Garden Markers
Why it works: Combines art with practical purpose (labeling herbs). Requires planning (sketching design), fine motor precision (painting details), and patience (waiting for layers to dry). Creates a lasting artifact they can point to with pride: “I made that!” Introduces basic botany if growing the plants.
* Ideal Path:
1. Collect & Prep: Find smooth, flat rocks. Wash and dry thoroughly.
2. Prime: Apply one coat of white acrylic paint or gesso. Let dry.
3. Design: Lightly sketch herb names/icons with pencil (e.g., “BASIL” with a leaf).
4. Paint: Use fine-tip acrylic paint pens or small brushes. Outline first, then fill.
5. Seal: Apply 2 coats of clear, non-toxic outdoor sealer (e.g., Mod Podge Outdoor).
6. Install: Place rocks next to corresponding plants in garden or pots.
* Budget Path: Use regular washable markers on rocks (less durable, fine for indoor pots). Skip sealing. Write names with permanent marker directly on smooth stones. No garden? Make “kindness rocks”—paint uplifting words (“SMILE,” “HOPE”) to place in parks with permission.
* Quick Connection Path: Decorate one rock with a single symbol representing your child’s favorite thing (a soccer ball, a music note). Seal with clear nail polish (adult applies). Keep on their desk as a “bravery rock” for tough days.
Safety & Adaptation: Work in a well-ventilated area when sealing. Use smocks. For children with less steady hands, suggest bold, simple designs (large letters, one icon). Problem-Solving Moment: Paint smudged? “No problem! We can turn that smudge into a ladybug spot or a raindrop.” Educational Extension: Research the herb together: “Why do cooks use basil? What does it smell like?” Connects art to science and culture.
Project 2: Upcycled Bird Feeder from a Milk Carton
Why it works: Teaches environmental awareness (repurposing materials), basic engineering (making it stable/weather-resistant), and fosters empathy for wildlife. The multi-step process builds sequential thinking. Observing birds provides ongoing engagement beyond the build.
* Ideal Path:
1. Clean: Thoroughly wash and dry a half-gallon milk carton. Remove plastic spout.
2. Cut: Adult cuts a large U-shaped window on one side (bottom edge 2 inches from base). Cut a small hole below the window for a dowel perch; insert and secure with non-toxic glue.
3. Decorate: Cover carton with contact paper or paint with acrylics. Add non-toxic decorations (twine, pressed flowers under sealer).
4. Hang: Punch two holes near the top, thread strong twine through, and tie securely.
5. Fill & Observe: Add birdseed. Hang from a tree branch. Keep a “Bird Journal” to sketch visitors.
* Budget Path: Use a plastic bottle (soda bottle). Cut holes just large enough for seed to spill out. Insert wooden spoons through opposite sides as perches/feeders. No paint? Decorate with permanent markers.
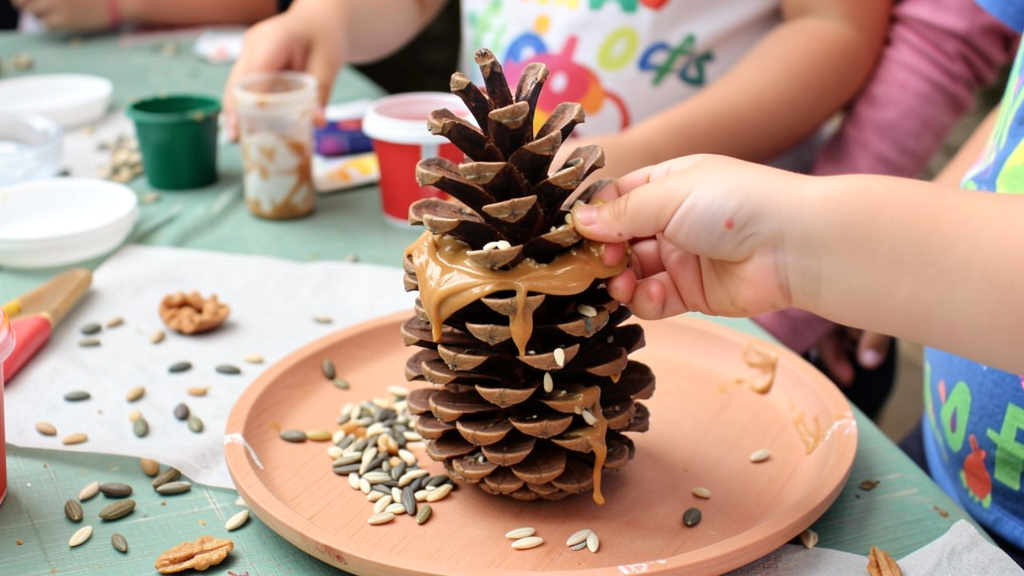
* Quick Connection Path: Make a pinecone feeder: Spread sunflower seed butter (allergy-safe alternative to peanut butter) on a pinecone. Roll in birdseed. Tie string to top. Hang immediately. Ready in 10 minutes.
Safety & Adaptation: Critical: Adult handles all cutting. Sand any rough cardboard edges. Use only non-toxic, water-based paints and sealants. Avoid sugary coatings that can harm birds. Place feeder where predators cannot access it. Learning Opportunity: Discuss why certain birds visit (“Cardinals like sunflower seeds!”). Check local wildlife guidelines—some areas advise against feeders during specific seasons. Emotional Connection: “We’re helping our feathered neighbors find food. How do you think the bird feels when it finds this?”
Project 3: Friendship Bracelet Weaving Station
Why it works: Develops sustained focus, pattern recognition (math!), and fine motor precision. Creating gifts fosters empathy and social connection. The repetitive motion can be meditative and calming. Successfully completing a bracelet provides a powerful boost to self-efficacy.
* Ideal Path:
Setup: Secure a clipboard or piece of cardboard. Tape the knotted ends of 4-6 embroidery floss strands (24 inches long) to the top.
Basic Braid: Teach the simple 3-strand braid first. Progress to forward-backward knots for chevron patterns. Use online video tutorials (watch together) for visual learning.
Personalize: Choose colors representing friends’ favorites. Add a single bead before finishing.
Finish: Tie ends securely, trim excess, add a loop and button closure.
* Budget Path: Use yarn scraps or old t-shirts cut into strips. Braid three thick strands for a chunky bracelet. No clipboard? Tape strands to the edge of a table.
* Quick Connection Path: Make a “gratitude bracelet”: String 3-5 large wooden beads onto elastic cord. As you add each bead, share one thing you appreciate about your child (“This bead is for your kindness to your sister”). Tie securely. Wear as a reminder.
Safety & Adaptation: Supervise use of scissors. For children with fine motor challenges, start with wider ribbons or beginner loom kits. Frustration Buster: If knots get tangled, take a break. Say, “Our fingers need a rest. Let’s try again after snack.” Normalize struggle: “Weaving takes practice. Even grown-ups mess up sometimes!” Social-Emotional Angle: Discuss the meaning behind gifting: “How will your friend feel wearing something you made just for them?”
Late Elementary (Ages 9-11): Problem-Solving and Personal Expression
Children now seek greater autonomy and deeper challenge. Projects should involve research, multi-phase planning, troubleshooting, and opportunities for genuine self-expression. They appreciate understanding the “why” behind steps. Functional or gift-oriented projects hold high value. Peer interests may influence choices.
Project 1: Upcycled T-Shirt Tote Bag (No-Sew)
Why it works: Addresses real-world needs (reducing single-use bags), teaches textile upcycling, and results in a usable, personalized item. The no-sew method builds confidence. Requires measuring, cutting precision, and spatial reasoning (visualizing the 2D shirt becoming a 3D bag). Fosters environmental awareness.
* Ideal Path:
1. Select: Choose a 100% cotton t-shirt (graphics on front work well). Wash and dry.
2. Cut Bottom: Lay flat. Cut off hem cleanly.
3. Cut Fringe: Cut 3-inch vertical strips along the bottom edge, through both layers, spaced ½ inch apart.
4. Knot: Tie each front strip to the corresponding back strip tightly. Double-knot.
5. Reinforce (Optional): For heavier loads, cut armholes into simple rectangles. Knot fringe along new bottom edge of armholes to create side seams.
6. Decorate: Use fabric markers, iron-on patches, or fabric paint to personalize.
* Budget Path: Use an old, stained, or outgrown shirt. Skip decorative steps—focus on function. Use permanent markers for quick designs.
* Quick Connection Path: Transform a single sleeve into a pencil case: Cut sleeve off cleanly. Knot the raw end tightly. Decorate the cuff. Instant small pouch.
Safety & Adaptation: Use sharp fabric scissors (adult supervision recommended for initial cuts). Work on a protected surface. For children with grip strength challenges, use spring-loaded scissors or pre-cut the fringe. Problem-Solving Focus: “The knots keep coming loose? Let’s try a surgeon’s knot—it has an extra loop for security.” Encourage testing the bag with light items first. Real-World Connection: Discuss how reusable bags support community sustainability efforts. Pride Point: Using the bag for library books or shopping reinforces the value of their creation.
Project 2: DIY Board Game Design Challenge
Why it works: Integrates multiple disciplines: storytelling (theme/rules), math (scoring, probability), art (board design), and systems thinking (how rules interact). Requires planning, prototyping, playtesting, and revising—mirroring real-world design processes. Fosters collaboration if done with siblings/friends. Builds executive function skills (planning, flexibility).
* Ideal Path:
Phase 1: Concept (Day 1): Brainstorm theme (space adventure, jungle quest). Define goal (“Reach the treasure first”). Sketch simple rules on paper.
Phase 2: Build (Day 2): Create board on poster board. Draw path with markers. Make game pieces from clay, LEGO, or decorated bottle caps. Create cards (challenge cards, bonus cards) from index cards.
Phase 3: Playtest & Revise (Day 3): Play the game! Note what’s confusing, too easy, or unbalanced. Revise rules or board layout.
Phase 4: Finalize: Laminate board/cards with contact paper. Store pieces in a decorated shoebox.
* Budget Path: Use a large paper grocery bag flattened for the board. Draw with crayons. Game pieces: coins, buttons, or small toys. Cards: cut-up cereal box cardboard.
* Quick Connection Path: “Minute to Win It” Game: Draw a simple path on paper with 10 spaces. Write quick challenges on sticky notes (“Do 3 jumping jacks,” “Name 3 red things”). Roll a die, move, complete challenge. Playtest immediately.
Safety & Adaptation: Focus on collaborative rule-making to avoid arguments. Establish: “The designer decides, but we give kind feedback.” For children prone to frustration, keep initial rules very simple; complexity can grow over iterations. Critical Thinking Prompt: “If landing on this space gives 10 points, is that fair compared to other spaces? How could we balance it?” Long-Term Value: This project can evolve over weeks. Store the game box; revisit to add expansion packs. Documents growing complexity in thinking.
Project 3: Simple Sewing: Felt Bookmark with Embroidery
Why it works: Introduces foundational hand-sewing skills (running stitch, whip stitch) in a manageable, low-stakes project. Felt doesn’t fray, reducing frustration. Personalization (shapes, colors, embroidery) allows deep self-expression. Creates a functional item that encourages reading. Builds patience and fine motor control.
* Ideal Path:
1. Design: Cut two identical bookmark shapes from felt (rectangle, animal shape).
2. Decorate Front: Arrange smaller felt pieces (hearts, stars) or embroider a simple design (initial, flower) using embroidery floss and a blunt tapestry needle.
3. Sew: Place shapes together. Use whip stitch around edges with contrasting thread, leaving top open.
4. Finish: Thread ribbon or yarn through top hole for tassel. Knot securely.
* Budget Path: Use construction paper instead of felt (reinforce edges with clear tape). “Sew” with a hole punch and yarn lacing. Decorate with stickers or markers.
* Quick Connection Path: Pre-cut bookmark shapes. Focus solely on embroidery: teach 3-4 basic stitches (running, backstitch) on a small felt square to practice. Turn practice square into the bookmark.
Safety & Adaptation: Use blunt-tipped needles. Store needles safely in a pincushion. For children with fine motor challenges, use larger needles and thicker yarn. Start with lacing cards (pre-punched holes) to build confidence. Mindset Tip: Emphasize “practice stitches” on scrap felt. Imperfect stitches have character! Connection Opportunity: Make bookmarks as gifts for teachers, librarians, or grandparents. Include a handwritten note: “This bookmark holds my place in a book, just like you hold a special place in my heart.”
Tweens (Ages 12+): Independence, Skill-Building, and Authentic Creation
Tweens crave respect for their growing maturity and desire for authentic skill development. Projects should feel less “crafty” and more like legitimate hobbies or useful skills. Offer choices, explain the science/history behind techniques, and provide resources for deeper exploration. Safety discussions should be collaborative (“Let’s review the tool safety steps together”). Projects often align with identity exploration (fashion, tech, social causes).
Project 1: Air-Dry Clay Coil Pot
Why it works: Connects to ancient human traditions (pottery spans millennia), teaching cultural appreciation. Requires patience, planning (coil building sequence), and problem-solving (preventing collapse). The tactile process is deeply grounding. Results in a functional or decorative object reflecting personal style. Introduces concepts of form, function, and material properties.
* Ideal Path:
1. Base: Roll clay into a thick pancake (¼ inch). Score center with fork.
2. Coils: Roll clay into long, even snakes (¼ inch thick). Score ends.
3. Build: Apply slip (clay + water paste) to base edge. Press first coil onto base, blending seam inside/out. Continue coiling upward, blending each new coil to the one below. Smooth interior seams with damp finger.
4. Dry & Decorate: Air-dry completely (24-72 hrs depending on thickness). Sand lightly. Paint with acrylics. Seal with appropriate sealer.
5. Use: Hold pens, succulents (line with plastic if using for plants), or as a catch-all dish.
* Budget Path: Use homemade salt dough (1 cup flour, ½ cup salt, ½ cup water). Note: Less durable, best for decorative items. Bake at 200°F until hard (several hours). Paint after cooling.
* Quick Connection Path: Make a single coil ring: Roll one thick coil. Shape into circle. Blend ends. Flatten slightly. Dry, paint, seal. Wear as a statement ring or use as a napkin ring.
Safety & Adaptation: Work on a washable surface. Keep hands damp to prevent clay from sticking. Avoid inhaling dry clay dust. For wrist strain, take frequent breaks. Skill Progression: Discuss how hand-building is foundational to wheel-thrown pottery. Authentic Connection: Research indigenous pottery traditions (e.g., Pueblo pottery). Discuss cultural appreciation: “We honor this ancient skill by learning its history and creating our own original designs.” Problem-Solving: Walls collapsing? “The coil might be too thin, or we didn’t blend the seam well enough. Let’s reinforce this section.” Normalize iteration.
Project 2: Tie-Dye Exploration: Pattern and Chemistry
Why it works: Merges vibrant art with accessible chemistry (fiber reactive dyes bonding to cotton). Moves beyond basic spiral to teach pattern design, color theory (primary/secondary mixing), and precise technique. Results in wearable art they’ll proudly use. The process involves measurable steps (mixing ratios, timing), appealing to logical thinkers.
* Ideal Path:
1. Prep: Use 100% cotton items (t-shirts, socks, tote bags). Wash (no fabric softener). Wear gloves.
2. Fold & Bind: Explore techniques:
– Bullseye: Pinch center, wrap rubber bands concentrically.
– Stripes: Accordion fold vertically, bind with bands.
– Crumple: Randomly scrunch fabric, bind tightly.
3. Apply Dye: Follow kit instructions precisely (ratios matter!). Apply colors where bands create resist.
4. React: Place in plastic bag. Wait 6-24 hours (time affects intensity).
5. Rinse & Set: Rinse in cold water until clear. Wash separately. Dry.
* Budget Path: Use food coloring and vinegar solution on damp white cotton (less colorfast, but demonstrates concept). Or, use fabric markers to draw geometric patterns on pre-folded fabric before unfolding.
* Quick Connection Path: Tie-dye a single cotton handkerchief or bandana. Faster drying time. Use just two colors for a minimalist look.
Safety & Adaptation: Essential: Work outdoors or in a well-ventilated area. Wear old clothes, gloves, and eye protection if mixing powder dyes. Cover surfaces thoroughly. Discuss chemical safety respectfully: “These dyes are safe when we follow the steps, just like kitchen ingredients.” Science Deep Dive: Explain why soda ash (in kits) helps dye bond to fabric. Test variables: “What happens if we leave it 8 hours vs. 24 hours?” Document results. Ethical Note: Discuss textile sustainability. “Creating one special shirt we love supports mindful consumption.” Personal Expression: Design patterns with intention: “This spiral represents growth,” or “These stripes are my favorite colors.”
Project 3: Basic Woodworking: Custom Phone Stand
Why it works: Builds genuine, transferable skills (measuring, sanding, clamping) with immediate practical application. Fosters respect for tools and materials. Requires spatial reasoning and precision. The tangible result—a sturdy, functional object—provides immense satisfaction and counters disposable culture. Empowers tweens with “I built this” confidence.
* Ideal Path (Adult Supervision Required):
1. Design: Sketch stand on paper. Determine angles for phone slot.
2. Cut (Adult): Using a handsaw or coping saw, cut two identical trapezoid pieces from ½-inch pine (approx. 4″x3″). Cut a small rectangular slot near the top of each for the phone.
3. Sand (Tween): Sand all edges smooth with medium, then fine grit sandpaper. Wipe clean.
4. Assemble: Apply wood glue to one edge. Clamp pieces together. Wipe excess glue. Let dry per instructions.
5. Finish: Sand lightly again. Apply food-safe mineral oil or beeswax finish. Optional: Wood-burn initials or a small design (with adult supervision and proper tool training).
* Budget Path: Use thick cardboard or foam board. Cut shapes with utility knife (adult). Glue layers together for thickness. Decorate with paint or washi tape. Less durable, but teaches design principles.
* Quick Connection Path: Carve a simple stand from a single block of soft basswood using a child-safe carving knife (like a Flexcut Jack knife) under close supervision. Focus on shaping one piece.
Safety & Adaptation: Non-negotiable: Safety goggles for everyone. Adult handles all cutting initially. Teach tool respect: “This saw is sharp to do its job well; we honor it by using it carefully.” Start with hand tools. Practice sanding technique on scrap wood. Mindset Shift: Frame mistakes as learning: “The slot is a bit wide? We can add a thin shim of wood glued inside. Problem-solving is part of building!” Long-Term Pathway: This project can ignite a lifelong interest. Discuss local makerspaces, community workshops, or library tool-lending programs. Pride Moment: Using the stand daily reinforces capability. “Every time I charge my phone, I remember I made this.”
Themed Project Collections for Every Interest and Season
Sometimes inspiration strikes around a theme, season, or available materials. These collections offer curated ideas with unifying principles, adaptable across ages using the framework layers. Always prioritize safety and local context.
Nature-Inspired Creations: Observing and Honoring the Outdoors
Nature is a boundless source of materials and wonder. These projects encourage observation, respect for ecosystems, and finding beauty in natural elements. Core Principle: “Take only pictures, leave only footprints.” Collect only fallen items; never disturb living plants, animals, or habitats.
* Pressed Flower Art: Place flowers/leaves between sheets of newspaper inside a heavy book. Weight with more books. Wait 1-2 weeks. Create bookmarks, framed art, or decoupage onto cards. Age Adaptation: Toddlers arrange pre-pressed items on contact paper. Tweens design intricate botanical illustrations labeling parts.
* Pinecone Critters: Collect pinecones. Glue on googly eyes, felt ears, pipe cleaner legs. Make owls, hedgehogs, or aliens. Safety: Adult supervision required. Bake pinecones at 200°F for 30 minutes on a baking sheet to kill insects and open scales. Ensure oven is clean and monitored. Discussion Point: “Why do pinecones open when warm? (They release seeds!)”
* Leaf Printing: Dip leaves (vein-side down) in washable paint. Press onto paper. Experiment with overlapping prints. Science Link: Compare prints from different trees—maple vs. oak veins tell stories.
* Seed Bomb Making (Community Beautification): Mix 5 parts clay powder, 1 part soil, 1 part native wildflower seeds. Add water to form dough. Roll into marble-sized balls. Dry 24 hrs. Important: Place only in areas where you have explicit permission, such as community gardens or with landowner consent. Use ONLY native, non-invasive seeds appropriate for your local ecosystem. Discuss local habitats and responsible stewardship.
Recycled Material Masterpieces: Creativity from Everyday Items
Transforming discarded items teaches resourcefulness and environmental awareness. Core Principle: Clean materials thoroughly. Remove sharp edges. Prioritize safety over aesthetics.
* Cardboard Tube Creatures: Toilet paper/paper towel tubes become robots, animals, or rockets. Cut, paint, add details. Pro Tip: Flatten tubes slightly for easier painting. Age Adaptation: Toddlers scribble on tubes; adults assemble. Tweens engineer complex structures (a tube city!).
* Plastic Bottle Greenhouse: Cut top off large soda bottle. Place bottom half over a small seedling in a pot. Creates a mini greenhouse. Science Link: Discuss how the enclosed space traps warmth to support plant growth.
* Magazine Collage Vision Board: Cut inspiring images/words from old magazines. Glue to poster board. Theme: “My Happy Place,” “Goals for This Year.” Emotional Benefit: Powerful tool for self-reflection and positive visualization, especially for tweens.
* CD Mosaic Art: Break old CDs (Adult: wrap securely in cloth, tap gently with hammer while wearing eye protection) into shards. Glue shiny-side up onto a pre-drawn shape (fish, flower) on wood. Seal with strong adhesive. Safety: Sand sharp edges. Discussion: “CDs are difficult to recycle. Giving them new life is creative reuse!”
STEAM-Powered Projects (Science, Technology, Engineering, Art, Math)
Integrate disciplines seamlessly. The art makes the science accessible; the science gives the art depth. Core Principle: Focus on curiosity and observation. “What do you think will happen? Why?”
* Baking Soda & Vinegar Volcano (Classic with a Twist): Build volcano from clay or papier-mâché around a small cup. Add dish soap and food coloring to vinegar before adding baking soda. Why the soap? Creates more foam (traps CO2 gas bubbles). Math Link: Measure ratios—”What happens if we use twice the baking soda?”
* Homemade Lava Lamp: Fill clear bottle ¾ with vegetable oil, ¼ with water. Add food coloring (drops sink through oil). Drop in an effervescent tablet (such as Alka-Seltzer). Watch bubbles rise! Science: Oil/water density; gas bubbles carrying colored water upward. Safety: Use plastic bottle. Supervise closely.
* Paper Circuit Greeting Cards: Use copper tape, coin battery, and LED light to make a card that lights up. Resources: Beginner kits (like Chibitronics) offer templates. Engineering Skill: Learning circuit paths—tape must connect battery + to LED leg, and LED other leg to battery -.
* Geometric String Art: Hammer small nails into wood board in a shape (heart, star). Wrap colored string around nails in patterns. Math Link: Explore symmetry, angles, and patterns. Safety: Adult handles hammering. Use pre-drilled boards for younger children.
Sensory and Calming Crafts: Supporting Regulation
These projects prioritize the sensory experience over visual outcome. Ideal for winding down, managing big emotions, or supporting neurodiverse children. Core Principle: Follow the child’s lead. If an activity causes distress, pause gently. Offer alternatives.
* Cloud Dough: 8 cups flour + 1 cup baby oil. Mix. Feels like damp sand but holds shape. Mold, crumble, hide small toys. Sensory Note: Provides calming proprioceptive input. Store in airtight container.
* Sensory Bottles (Expanded):
– Ocean Bottle: Water, blue food coloring, glitter, small plastic sea creatures.
– Lava Lamp Bottle: Water, vegetable oil, food coloring, piece of effervescent tablet (temporary effect).
– Glitter Calm-Down Bottle: Clear glue, hot water, glitter. Glitter falls slowly. Use: Shake when upset; breathe deeply until glitter settles.
* Kinetic Sand Making: 2 cups sand + 1 cup cornstarch + ½ cup water. Mix. Moldable, holds shape, crumbles softly. Alternative: Use play sand from hardware store (bake first to sterilize).
* Weighted Lap Pad: Sew two fabric squares together (leave opening). Fill with rice or poly pellets. Sew shut. Provides deep pressure input, which can be calming. Safety: Ensure stitching is extremely secure. Weight should be no more than 10% of child’s body weight. Consult an occupational therapist if using for specific therapeutic needs.
Holiday and Seasonal Celebrations: Creating Meaningful Rituals
Move beyond store-bought decor. Create rituals through making. Core Principle: Focus on the shared process of preparing, not just the decorated result. Involve children in age-appropriate ways. Note: Adjust seasonal references for your hemisphere and local traditions.
* Advent Calendar Crafting: Instead of buying one, make it together. Ideas:
– Paper Chain: 24 links; tear one off each day. Write a small act of kindness on each (“Draw a picture for Grandma”).
– Envelope Calendar: Decorate 24 small envelopes. Fill with notes, stickers, or tiny treats.
– Nature Calendar: Collect one small natural item each day leading up to a significant seasonal date in your location (such as the winter solstice, adjusted for your hemisphere).
* Eco-Friendly Gift Wrapping Station: Set up station with:
– Brown paper bags (cut open)
– Fabric scraps for bows
– Twine, yarn
– Stamps made from potato halves or corks
– Natural elements: sprigs of pine, cinnamon sticks
Value: Teaches thoughtfulness over commercialism. “The wrapping is part of the gift!”
* Memory Ornaments: Each year, make one ornament representing a key memory (a clay footprint, a photo decoupaged on wood, a tiny model of a vacation spot). Emotional Impact: Creates a deeply personal tree. On celebration eve, hang ornaments while sharing the story behind each. Builds family narrative.
* Gratitude Tree: Place bare branches in a vase. Cut leaf shapes from paper. Each day, write something you’re grateful for on a leaf and hang it. Watch the tree “blossom” with thankfulness. Adaptation: Use a small potted plant; hang leaves on its branches.
Navigating Common Challenges: Turning Friction into Connection
Even with thoughtful planning, hurdles arise. How you respond shapes your child’s long-term relationship with creativity. These strategies transform friction points into teaching moments.
When Frustration Surfaces: “I Can’t Do It!”
This signals overwhelm—not defiance. The task has exceeded their current capacity (Zone of Proximal Development). Your calm response is critical.
* Pause and Validate: Kneel to their level. “This feels really hard right now. It’s okay to feel frustrated.” Naming the emotion reduces its intensity. Avoid dismissing (“It’s easy!”) or rushing to fix.
* Break It Down: “Let’s just do the very next tiny step. Can you hand me the red crayon?” Or, “Shall we work on just this corner for two minutes?” Micro-steps rebuild agency.
* Offer Controlled Choice: “Would you like to try the blue part first, or shall I hold the paper steady while you glue?” Choice restores a sense of control.
* Model Calm Problem-Solving: “Hmm, the glue is sticky. Let’s wipe our fingers on this cloth. There. Ready to try again?” Show that challenges are solvable.
* Know When to Pivot: If tears persist, gently close the project. “Our brains need a break. Let’s put this in the Pause Box and try again tomorrow.” This teaches self-regulation, not quitting. Never shame: “Big kids don’t cry over glue.” Long-Term Strategy: After calm returns, reflect simply: “Remember when the scissors felt tricky? You took a breath and tried again. That was brave.”
Managing Mess: Embracing Controlled Creativity
Mess often signifies deep engagement. The goal isn’t sterility; it’s manageable, respectful creativity.
* Pre-Game the Cleanup: Before starting, involve your child: “When we’re done, how will we clean up? You wipe the table, I’ll sweep the floor?” Make it a shared ritual. Sing a “cleanup song.”
* Contain the Chaos: Use the “tray method” for small projects—everything stays on a baking sheet or plastic tray. For paint, place paper inside a shallow cardboard box lid. Lay down a dollar-store shower curtain under the workspace.
* Designate a “Creativity Zone”: As in Layer 2, have a specific area (garage, patio, kitchen nook) for messier projects. Children learn spatial boundaries: “Paint stays in the blue zone.”
* Reframe the Narrative: Instead of “You made a huge mess!” try “Wow, you really dove into that project! Look at all the colors you mixed. Now let’s tackle the cleanup together.” Focus on their engagement, not the aftermath.
* Post-Cleanup Ritual: After cleanup, acknowledge the effort: “We worked as a team to clean up. The space is ready for our next creation!” This builds responsibility without shame. Important: For children with sensory processing differences distressed by mess, offer alternatives: “Would you like to wear an apron?” or “Let’s use washable markers instead of paint today.”
The “Pause Box” for Projects in Progress
Half-finished crafts can create guilt. Shift perspective.
* Reframe “Abandonment”: Label a small bin “Projects in Progress.” If interest wanes, say: “Shall we put this in the Pause Box? We can revisit it when you feel inspired.” This removes judgment. Many projects get revisited weeks later with fresh eyes.
* Celebrate the Attempt: “You tried mixing those colors—that was a great experiment! Even though we didn’t finish the whole picture, I loved watching you explore.” Validate the effort invested.
* Curate Together: Monthly, review the Pause Box with your child. “Does this still spark joy? Should we finish it, repurpose the materials, or compost the paper?” Teach discernment. Keep only what holds meaning.
* Redefine “Done”: A project isn’t failed if unfinished. The learning happened in the doing. A child who spent 20 minutes meticulously sorting beads by color before losing interest practiced categorization and fine motor skills—that was the project’s purpose that day.
* Let Go Gracefully: For truly paused items, involve your child in disposal: “This paper feels ready to become soil. Let’s tear it up for the compost bin.” Ritualizes release without waste-shaming.
Sibling Dynamics During Creative Time
Different ages/skills create natural friction. Turn potential competition into connection.
* Assign Complementary Roles: “You’re the Color Master—choose the paints. You’re the Glue Engineer—apply the glue carefully.” Roles play to strengths. Rotate roles next time.
* Create Individual Elements for a Group Project: Building a “family mural”? Each person decorates their own section of a long paper roll. Then assemble. Honors individuality within unity.
* Use Timers for Shared Tools: “You get the glitter shaker for 3 minutes, then it’s Maya’s turn. I’ll set the timer.” Visual timers reduce arguments.
* Model Conflict Resolution: If arguing erupts: “I hear you both want the red marker. What’s a fair solution? Take turns? Find another red tool?” Guide them to solve it, don’t dictate.
* Separate When Needed: Sometimes, parallel play is best. Set up two similar projects at separate stations. “You each get to make your own masterpiece.” Reduces comparison.
Caring for the Caregiver: Sustainable Creativity
You cannot pour from an empty cup. Sustainable DIY requires caring for yourself.
* Batch Prep: Spend 20 minutes prepping materials: pre-cut paper shapes, portion playdough, organize bins. Reduces daily decision fatigue.
* Embrace “Good Enough”: Release perfection. A lopsided clay bowl holds more love than a store-bought perfect one. Your child values your presence, not pristine results.
* Schedule Creative Time for YOU: Model creativity! While kids read quietly, sketch in your journal. Say aloud: “I’m feeling stressed; drawing helps me calm down.” Shows creativity is for everyone.
* Lower the Bar: Some days, “DIY” is coloring alongside your child for 10 minutes. That counts. Connection > complexity.
* Ask for Support: Partner takes kid craft time one evening. Swap childcare with a friend for a “creative playdate.” Share the load.
* Reflect on Joy: Keep a tiny notebook. Jot one joyful moment after crafting: “Liam’s giggle when the volcano erupted.” Revisit when feeling drained. Remember your “why.”
Your Questions, Answered
Q: How do I choose a project that won’t end in tears for my easily frustrated child?
A: Prioritize open-ended, process-focused activities with no “right way” (playdough, sensory bins, tearing paper for collage). Avoid projects requiring precise fine motor skills if that’s a current challenge. Frame it as “Let’s explore what this clay can do” rather than “Let’s make a perfect bowl.” Start with very short sessions (5-10 minutes) and stop before frustration sets in. Celebrate tiny efforts: “You tried three colors—that’s experimenting!”
Q: My child loses interest after two minutes. Am I doing something wrong?
A: Absolutely not. Short attention spans are developmentally typical, especially for younger children. This isn’t failure—it’s valuable information. Try “micro-projects”: decorate one rock, make one friendship bracelet knot, paint one section of a large mural. Follow their lead: if they abandon painting to stack cups, that’s valid exploration. The goal is fostering a positive association with creating, not task completion. Over time, as confidence grows, engagement duration often increases naturally.
Q: How do I handle it when my child compares their project to a sibling’s (or an online image) and feels “not good enough”?
A: Gently redirect focus to their unique journey. “I love how you used so many shades of blue—that shows careful observation.” Avoid comparing siblings aloud (“Look how neatly your sister glued hers”). Display all creations equally. Discuss how artists have different styles: “Picasso’s art looks different from Van Gogh’s, and both are celebrated.” Emphasize: “This is your creation, made with your hands and your ideas. That makes it special.”
Q: What defines truly non-toxic art supplies? How can I verify?
A: Look for the AP (Approved Product) seal from the Art & Creative Materials Institute (ACMI) in the US, or CE marking in Europe. These indicate independent toxicology review. For homemade items (playdough, paint), use only food-grade ingredients you’d consume. Avoid: borax (in slime), cadmium-based paints (check labels), solvents like turpentine. When uncertain, contact the manufacturer directly asking: “Has this product been evaluated by a toxicologist for chronic hazards?” Reputable companies provide documentation. For young children who mouth objects, prioritize washable, large-item materials.
Q: My space is tiny (apartment living). How can I do creative projects without chaos?
A: Embrace vertical and contained solutions. Use a folding table stored in a closet. Cover it with a vinyl tablecloth clipped on. Do paint projects in the bathtub (easy cleanup!). Use clip-on LED lights for good illumination. Store supplies in clear stackable bins under beds or in closets. Designate one small bin as the “Mobile Creation Station” (as in Layer 2) that can be set up and packed away in minutes. Focus on low-mess projects: origami, bead threading, collage with glue sticks.
Q: How do I encourage creativity without spending a fortune on supplies?
A: Your best resource is the recycling bin. Cardboard tubes, egg cartons, bottle caps, and scrap paper are gold. Visit thrift stores for inexpensive fabric scraps, old buttons, or ceramic tiles for mosaics. Nature provides endlessly: sticks, stones, leaves. Build a “Creation Station” gradually: add one new item per month (a set of colored pencils, a ball of yarn). Rotate materials to maintain novelty—store some items away, reintroduce later. Remember: constraints often spark greater creativity. A single sheet of paper can become a boat, a hat, or a drawing canvas.
Q: My tween says crafts are “babyish.” How do I engage them?
A: Shift language and projects. Drop the word “craft.” Offer skill-based activities with real-world application: basic sewing (mending clothes), woodworking (building a shelf), coding a simple game, upcycling furniture, or learning calligraphy. Connect to their passions: a soccer fan might design team logos; a gamer might build a diorama. Provide resources for self-directed learning (library books, reputable online tutorials). Respect their autonomy: “I found this tutorial on making resin keychains. Want to check it out together?” Offer to facilitate, not lead.
Q: How do I weave in learning (ABCs, numbers) without making it feel like school?
A: Integrate learning seamlessly into play. While making playdough snakes: “Can you make a snake as long as your hand? Now make one twice as long!” (math). During nature collage: “Find something that starts with ‘B’—a brown leaf, a blue feather” (literacy). While building a block tower: “How many blocks tall is it? Can you make it taller than your knee?” (measurement). The key is following their interest in the moment and gently extending it. If they’re not receptive, drop it. Forced learning diminishes joy. Trust that foundational skills develop through rich, varied play experiences.
Q: What if my child consistently refuses to participate?
A: Respect their autonomy. Forcing creates negative associations. Instead:
– Model enjoyment: Create nearby without pressure. “I’m making this for fun—join me if you’d like!”
– Offer ultra-low-barrier entry: “Just hand me the red marker,” or “Can you tear this paper into snow?”
– Connect to their world: “I saw you drawing dragons in your notebook. Want to try making a 3D dragon from clay?”
– Explore why: Are they tired? Overwhelmed by choices? Had a difficult experience before? Listen without judgment. Sometimes, simply sitting quietly together while you create is enough. Connection precedes creation.
Q: How do I store finished projects without my home becoming overwhelmed?
A: Implement a thoughtful curation system:
1. Immediate Display: Choose 1-2 pieces per child for the fridge/art wall. Rotate weekly.
2. Memory Box: Have one archival-quality box per child. At year’s end, review together. Keep only pieces that spark strong positive memories or represent significant growth. Photograph the rest before composting/recycling.
3. Functional Items: Prioritize projects that get used (mugs, tote bags, bookmarks). Their utility honors the creation.
4. Digital Archive: Photograph meaningful pieces. Create a digital album titled “[Child’s Name] Creations 2024.” Share with family.
5. Let Go Ritual: For items to discard: “This paper has served its purpose. Let’s thank it for the fun we had, then return it to the earth via compost.” Reduces guilt. The goal is preserving memories, not physical clutter.
Conclusion: Your Journey of Creative Connection Begins Now
You now hold more than a collection of project ideas. You carry a framework—a lens through which to view every sticky, glittery, wonderfully imperfect moment of creating with your child. Remember the three layers that transform activity into connection: Child-Centered Selection (meeting them where they are), Safe & Supportive Setup (honoring their capability), and Process-Over-Product Mindset (celebrating the journey). These principles apply whether you’re finger-painting with a toddler or building a birdhouse with a tween. The specific project matters far less than the consistent message your presence conveys: I see your effort. I value your ideas. We are in this together.
Let’s carry forward three gentle anchors:
1. Observe before you act. Notice your child’s current interests, energy level, and emotional state. Let that guide your choice—not external trends.
2. Prepare the environment thoughtfully. A few minutes of setup (containment trays, accessible tools) prevents hours of frustration. Safety and accessibility are acts of care.
3. Release attachment to the outcome. When you focus on the shared laughter, the problem-solving breakthrough, the quiet concentration, you free yourself and your child from the weight of perfection. The lopsided clay mug holds more love than any store-bought treasure.
The 24-Hour Rule: Your Tiny, Powerful Next Step
Before tomorrow ends, take one small, concrete action. Do not wait for the “perfect time.” Do not overthink. Choose one:
– If you feel overwhelmed: Place three items in a bin: a glue stick, a pair of child-safe scissors, and a stack of scrap paper. That’s your “Emergency Creation Kit” for the next time curiosity strikes.
– If you have a specific child in mind: Recall their current fascination (dinosaurs? rainbows?). Jot one project idea from this guide that aligns with it on a sticky note. Place it where you’ll see it.
– If you need permission to simplify: Whisper to yourself: “Today, ‘creative time’ was coloring for 7 minutes. It was enough.”
This tiny step builds momentum. It signals to yourself: I am capable of bringing this intention to life. Progress, not perfection.
The Bigger Picture: Weaving Threads of Belonging
In a world that often prioritizes speed, consumption, and screen-based engagement, choosing to create slowly with your hands—and your child’s hands—is a quiet act of presence. Each shared project weaves a thread into the fabric of your relationship: a thread of trust when you don’t fix their “mistake,” a thread of respect when you honor their design choices, a thread of resilience when you problem-solve a collapsed tower together. These threads accumulate into an unshakable bond, a shared language of “we made this,” that will sustain your child long after childhood. They carry forward the quiet confidence that they can imagine, create, and contribute to the world. And you? You rediscover the profound joy of making something simply for the sake of making—with wonder as your guide and connection as your compass. The glue may dry, the paint may fade, but the imprint of these moments—the feeling of being truly seen and valued in creation—endures. Your hands, working alongside theirs, are building more than objects. You are building belonging.
Explore More Creative Pathways:
The Mindful Maker’s Toolkit: Essential Supplies for Every Age | From Chaos to Calm: Sensory Regulation Through Art | The Gift of Making: DIY Presents That Teach Generosity | Beyond the Screen: 30 Screen-Free Connection Activities for Families | Raising the Creative Child: Nurturing Innovation in Everyday Moments